Deploy an ONNX Transformer to Sagemaker.

Introduction
The ecosystem for NLP and MLOps has exploded in the last few years. There are so many incredible innovations making model deployment faster and easier than I ever imagined. HuggingFace has revolutionized model sharing, and AWS SageMaker makes it easy to deploy and test our models. I love how easy it is to one click deploy any HuggingFace model to a SageMaker endpoint. But, these deployments leave a lot of performance on the table. We can achieve a 5X speedup at inference time on SageMaker with only a few lines of code. In this blog post we’ll walk through how to deploy an ONNX version of a transformer model to SageMaker. The post is broken into four parts:
-
Set up SageMaker
-
Deploy a vanilla transformer
-
ONNXify the transformer
-
Deploy the ONNX version of the transformer to SageMaker
As a disclaimer SageMaker is not free and this will incur some minor costs to explore ($0.23 / hr). Let’s get started!
Appeal to Reader
If you pay for Medium, or haven’t used your free articles for this month, please consider reading this article there. I post all of my articles here for free so everyone can access them, but I also like beer and Medium is a good way to collect some beer money : ). So please consider buying me a beer by reading this article on Medium.
Set up SageMaker
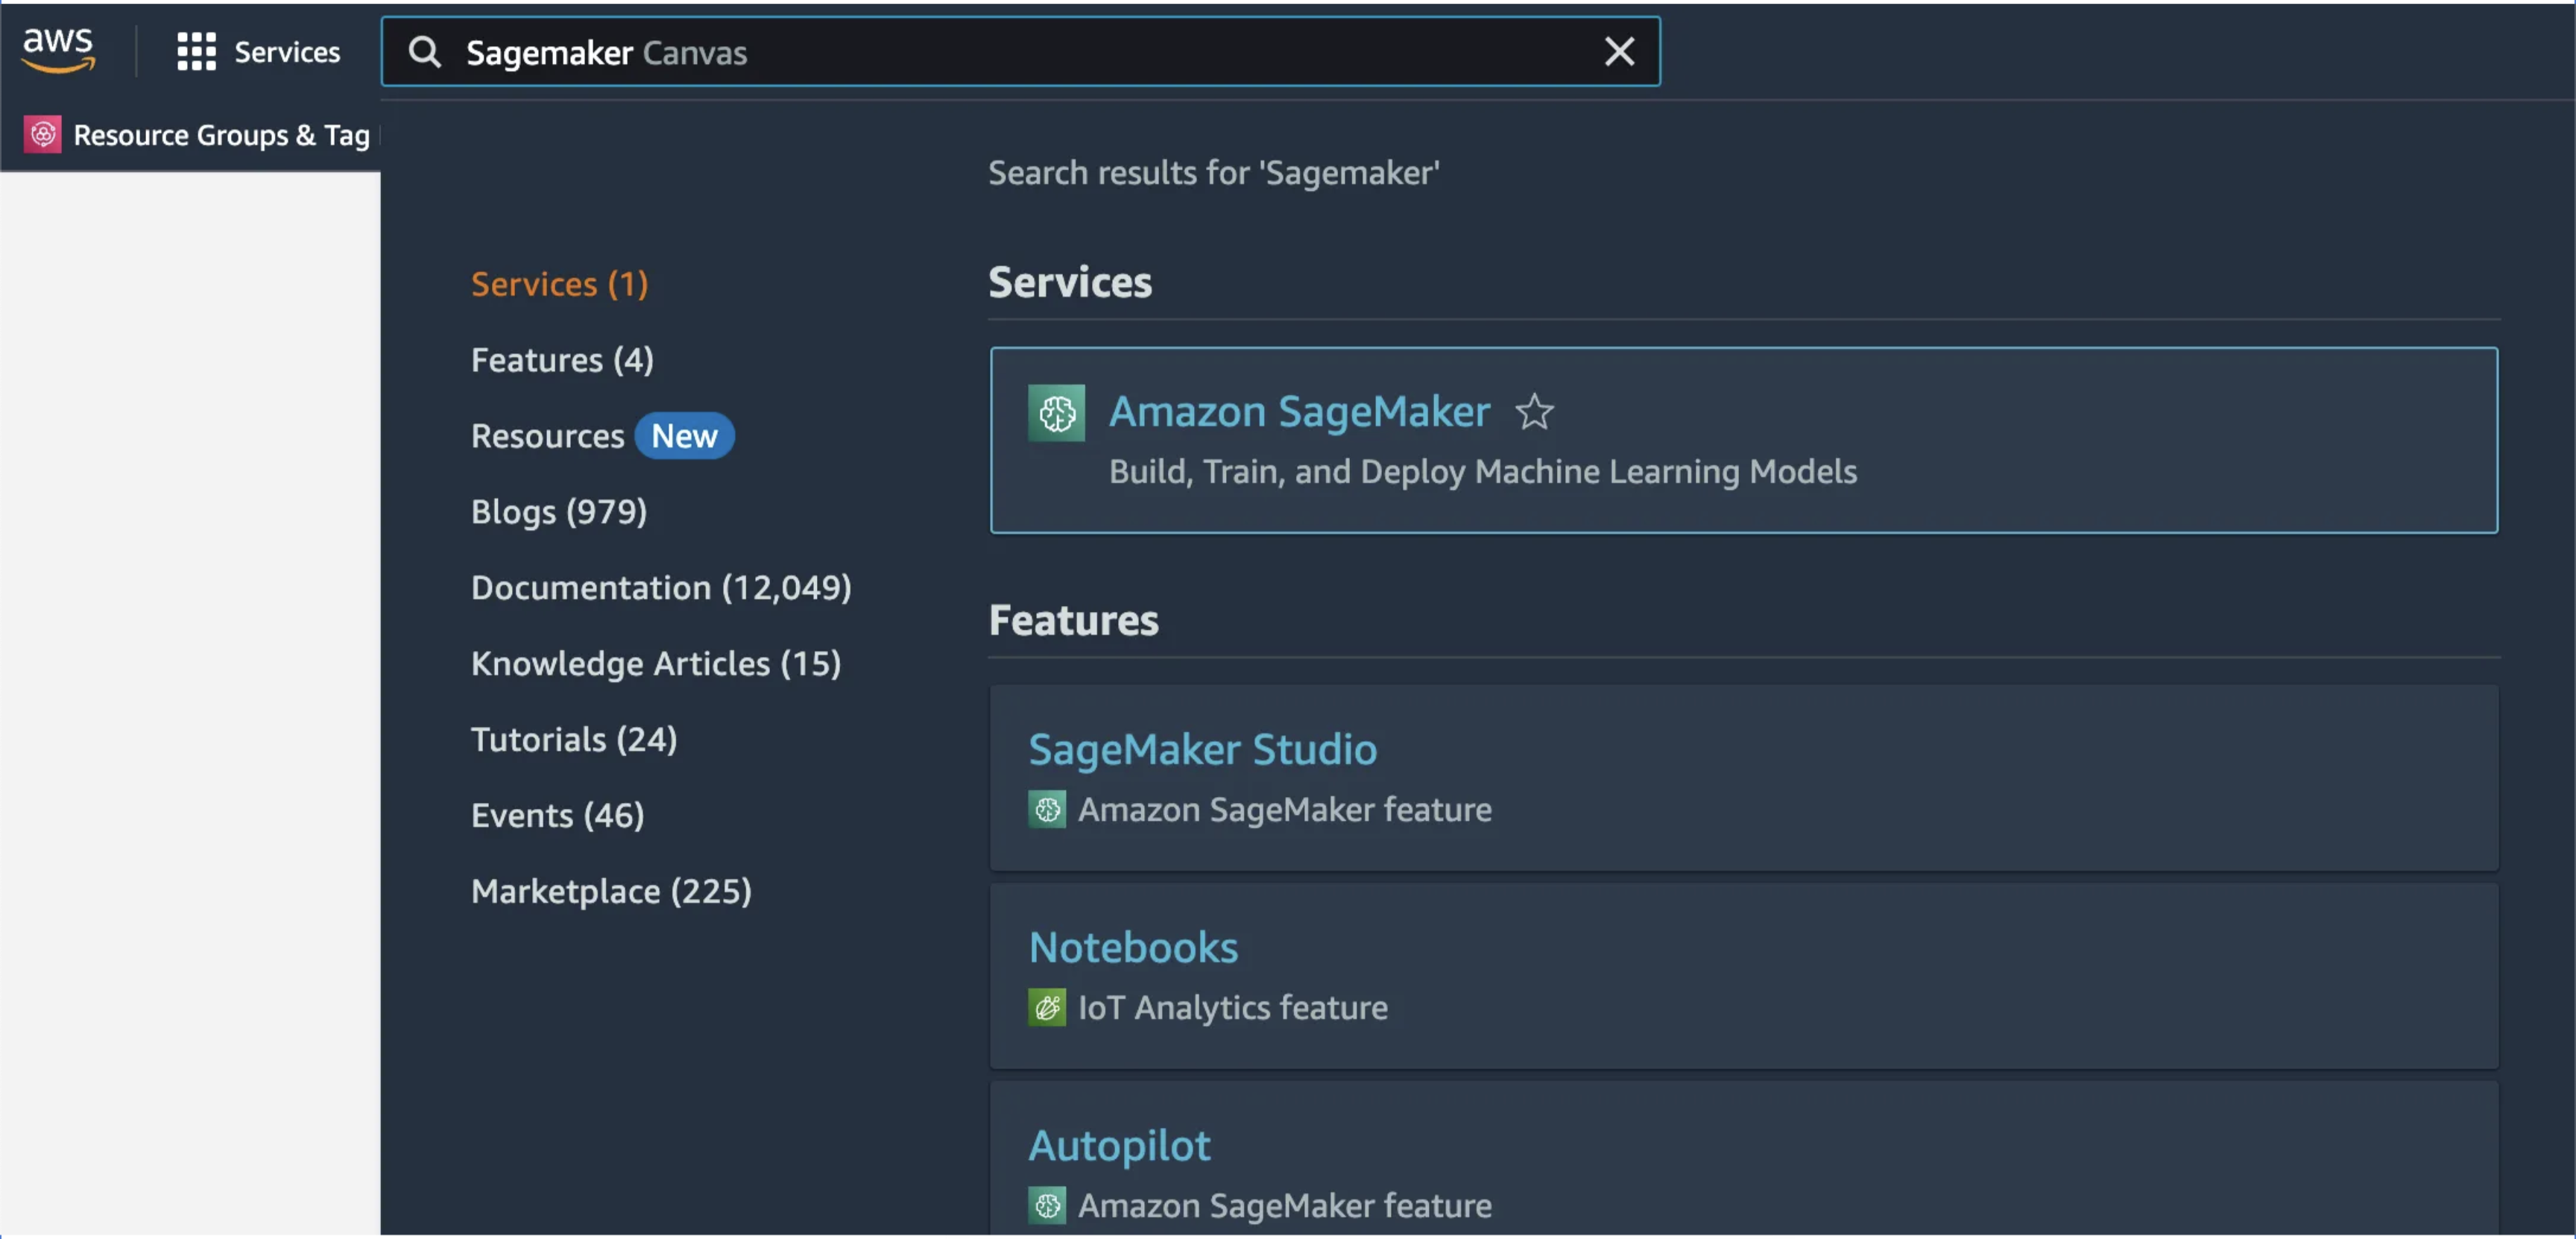
We’ll assume that you already have an AWS account setup. Once you log in click on the search bar in the top and search for SageMaker. Then select it from the options.
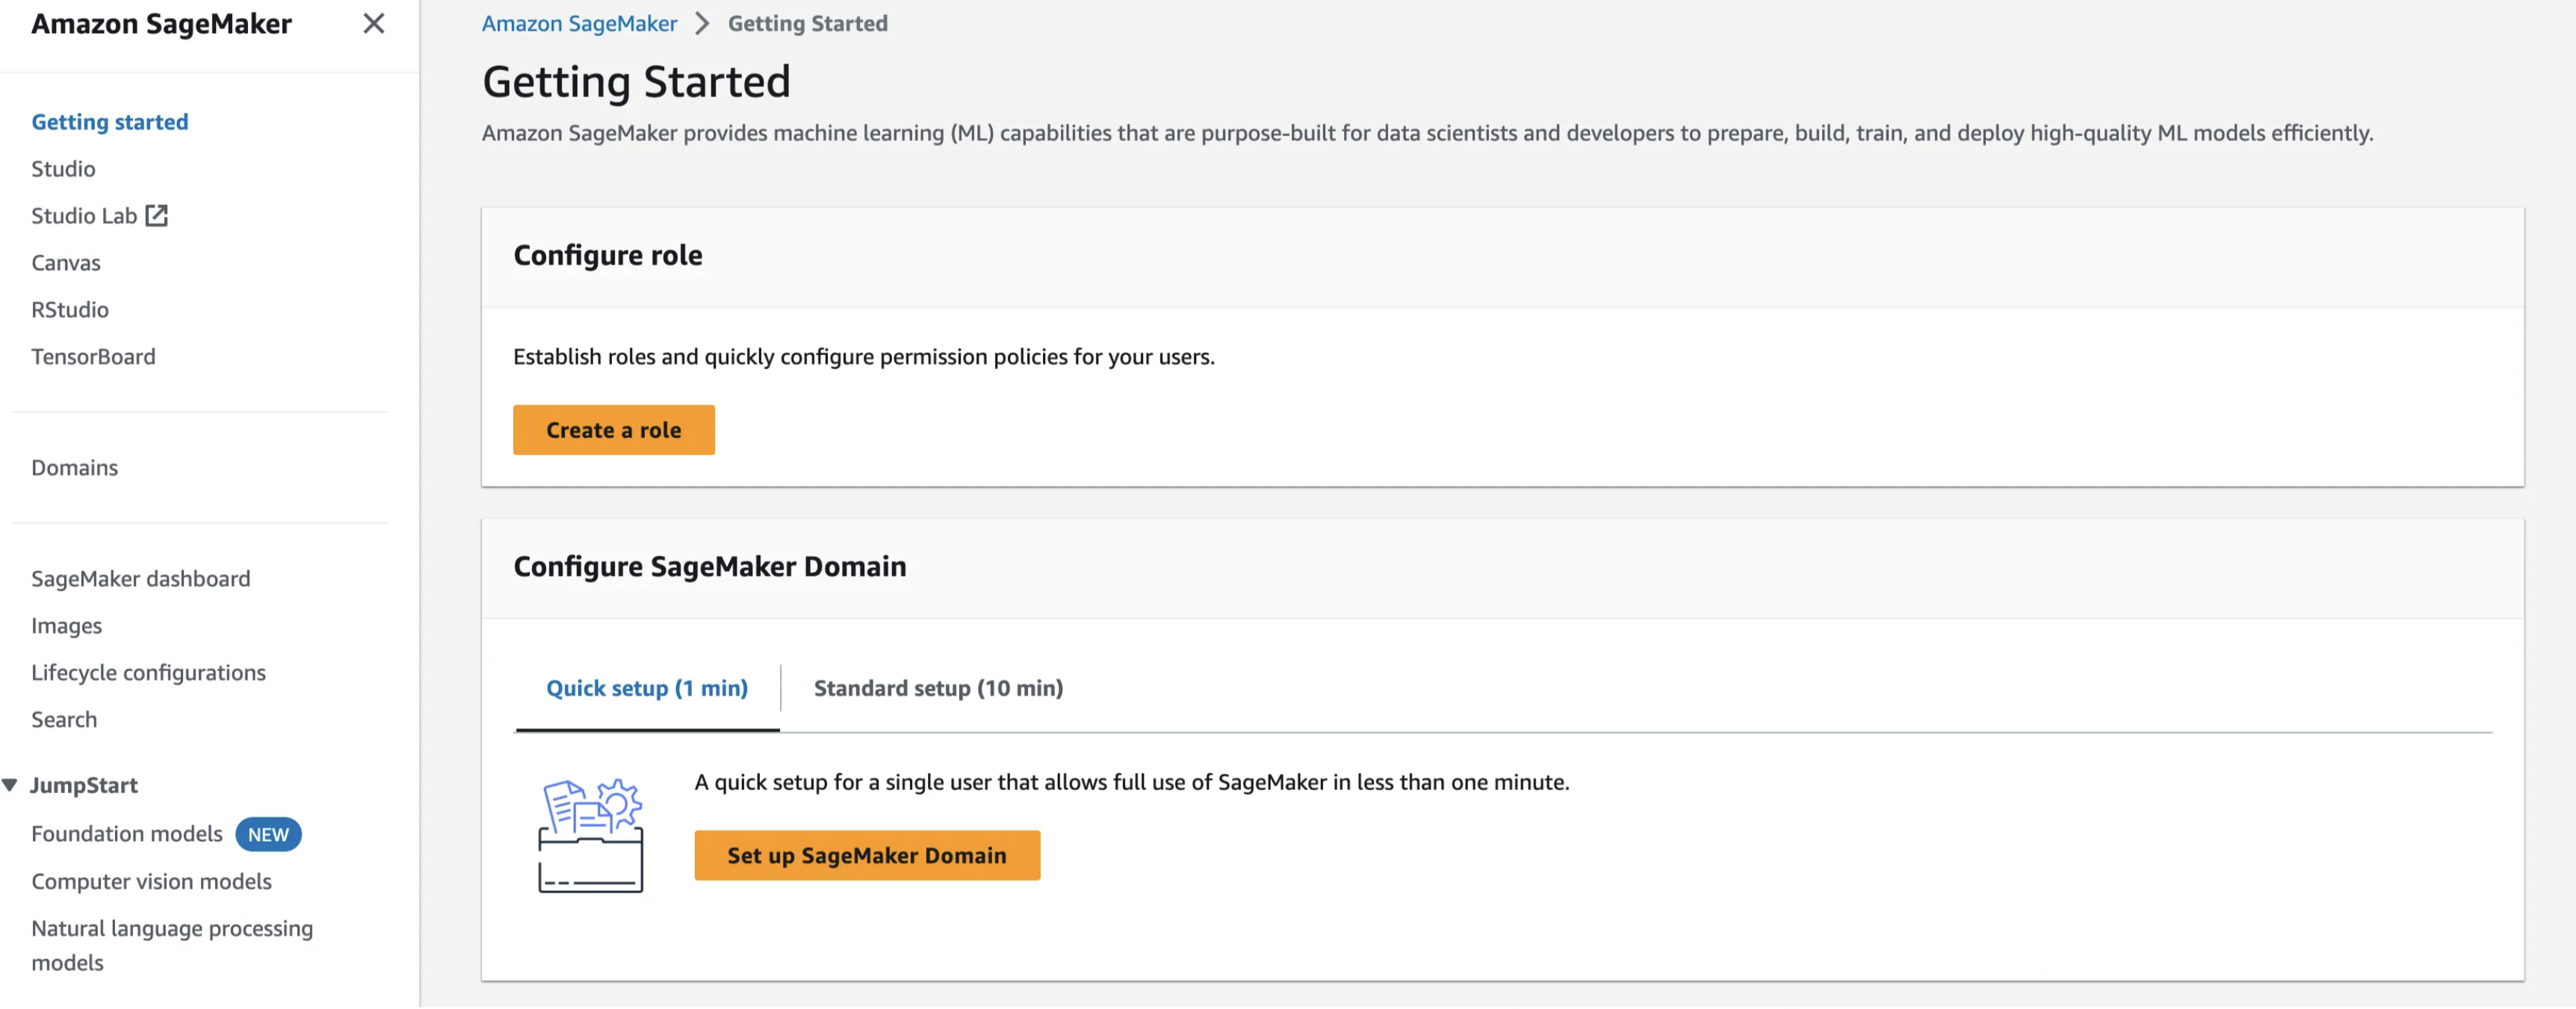
Select “Get Started” in the top right of the page.

Setup a SageMaker domain.
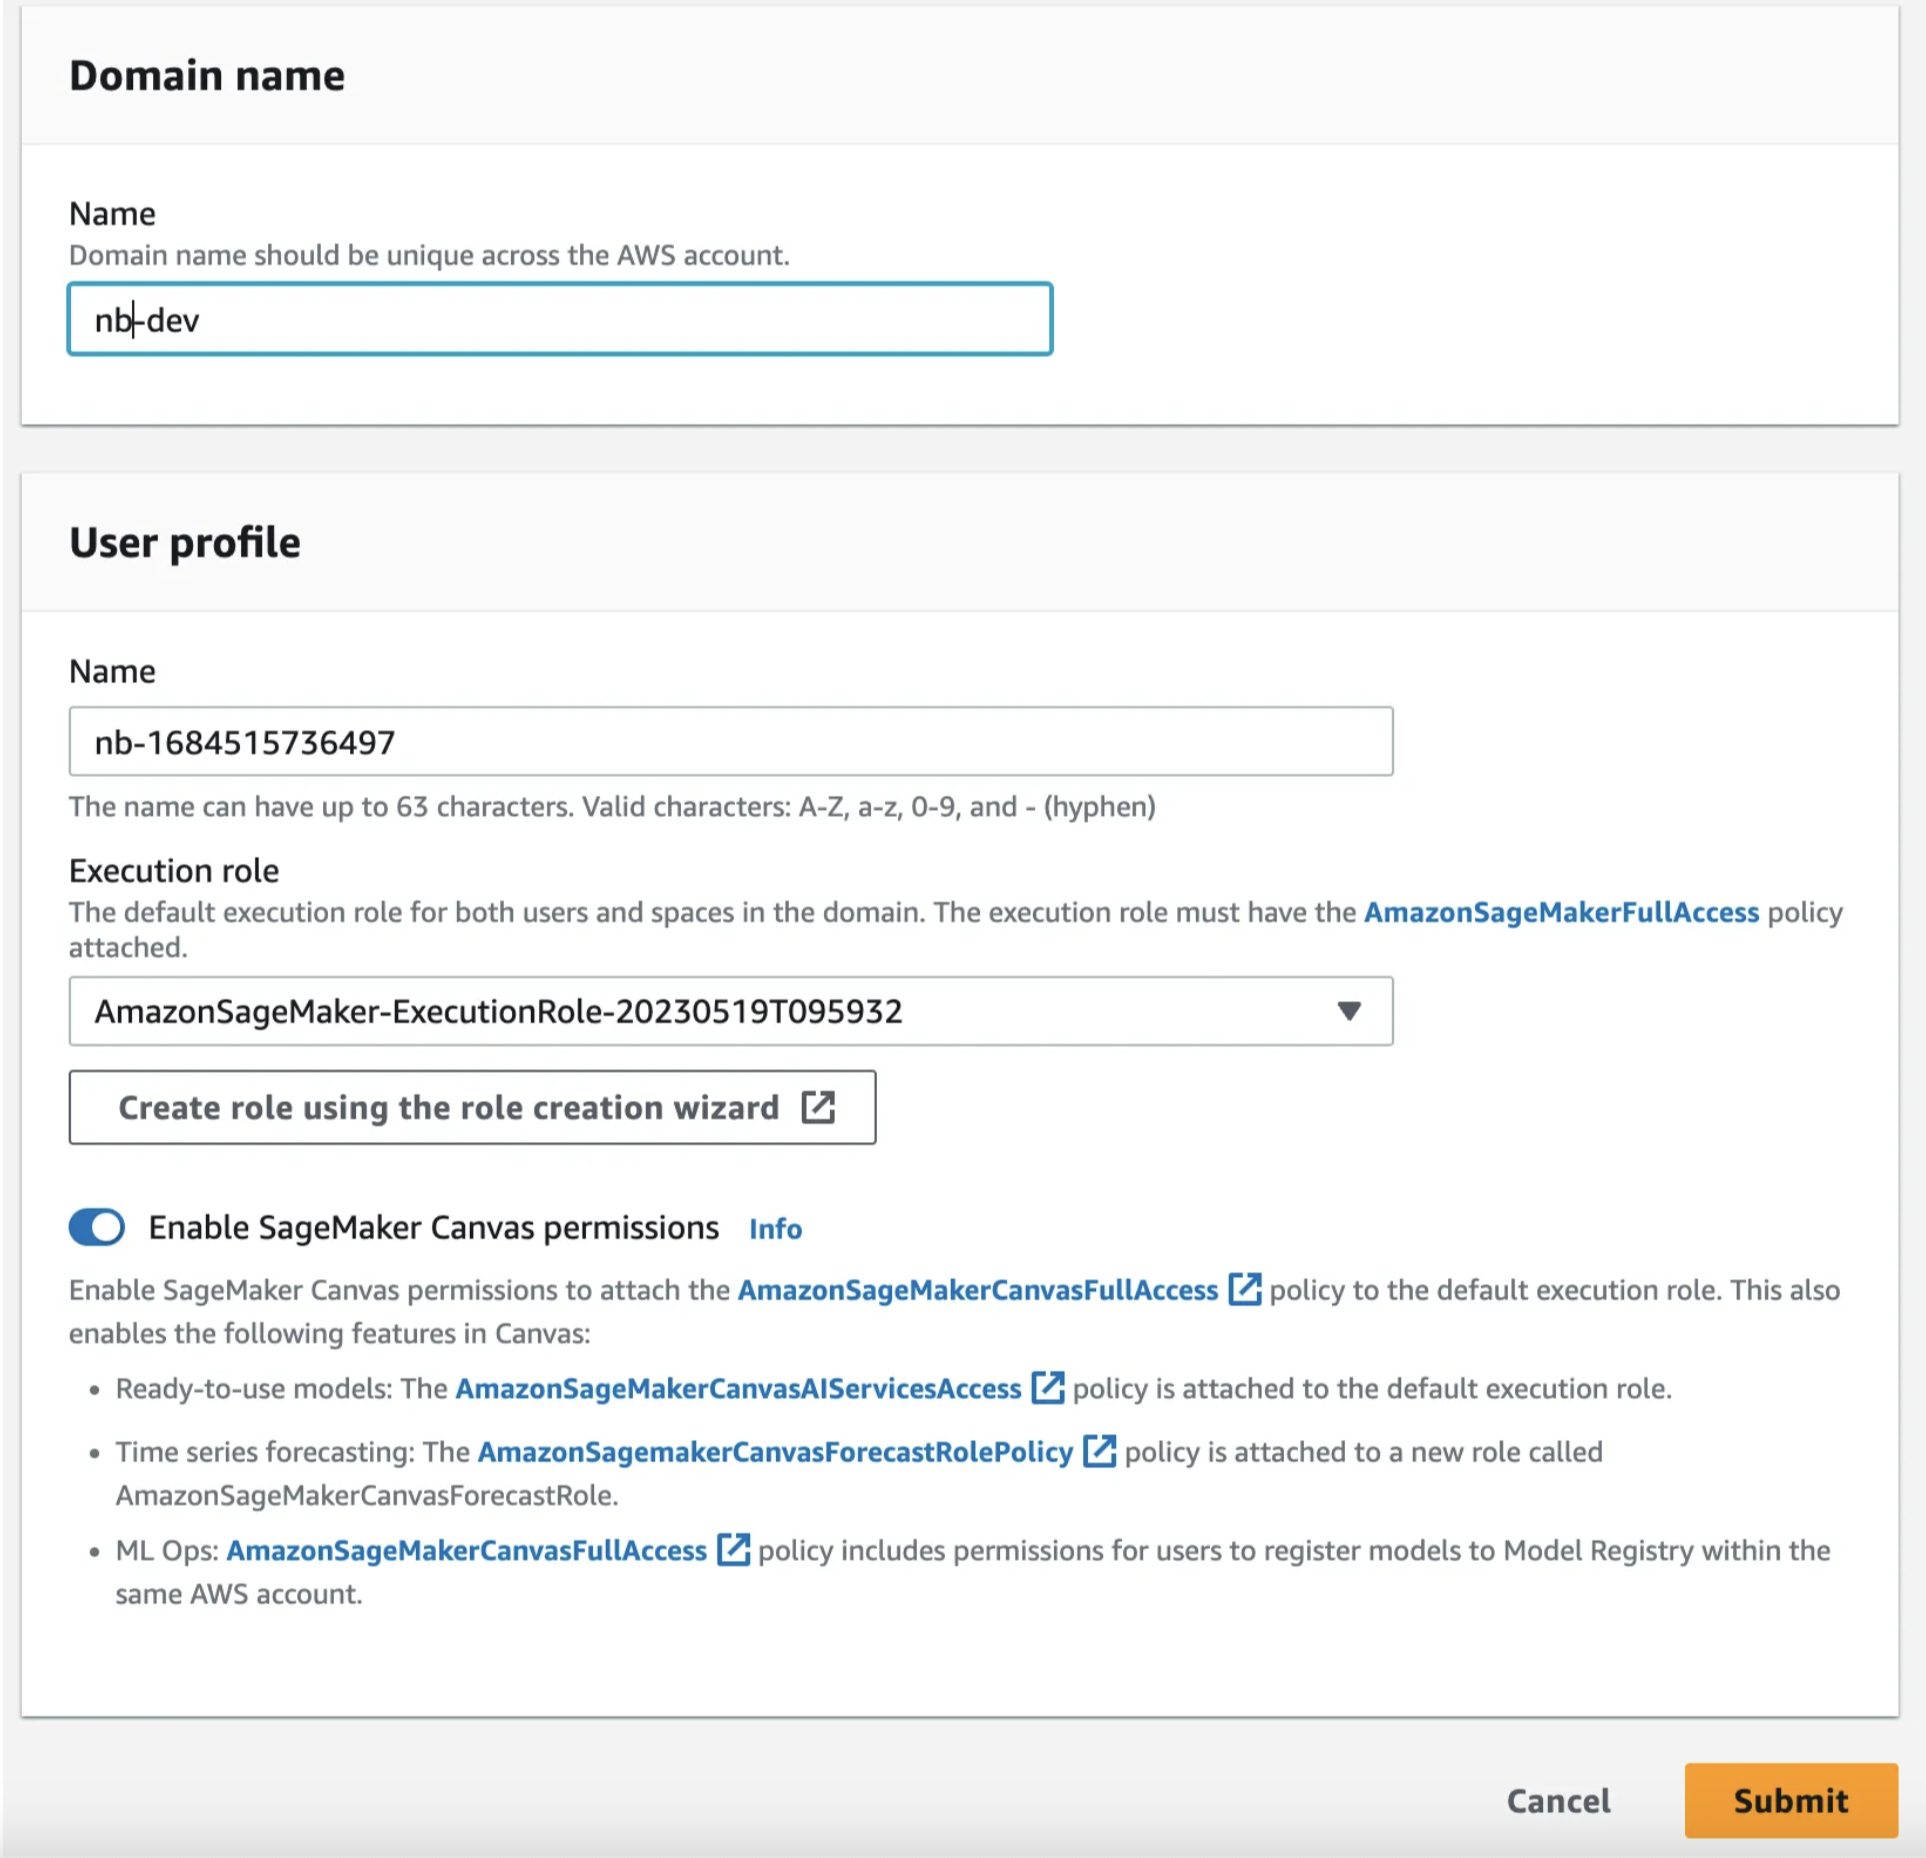
Fill in the domain name and the user profile. These don’t matter too much for personal projects just pick something you’ll remember. One caveat is that they will get appended to roles and there is a 64 character limit for these. If you choose a long name you might get errors. If this happens choose shorter names and try again. After filling in those details create an execution role. This will give SageMaker the rights to access and use other resources.
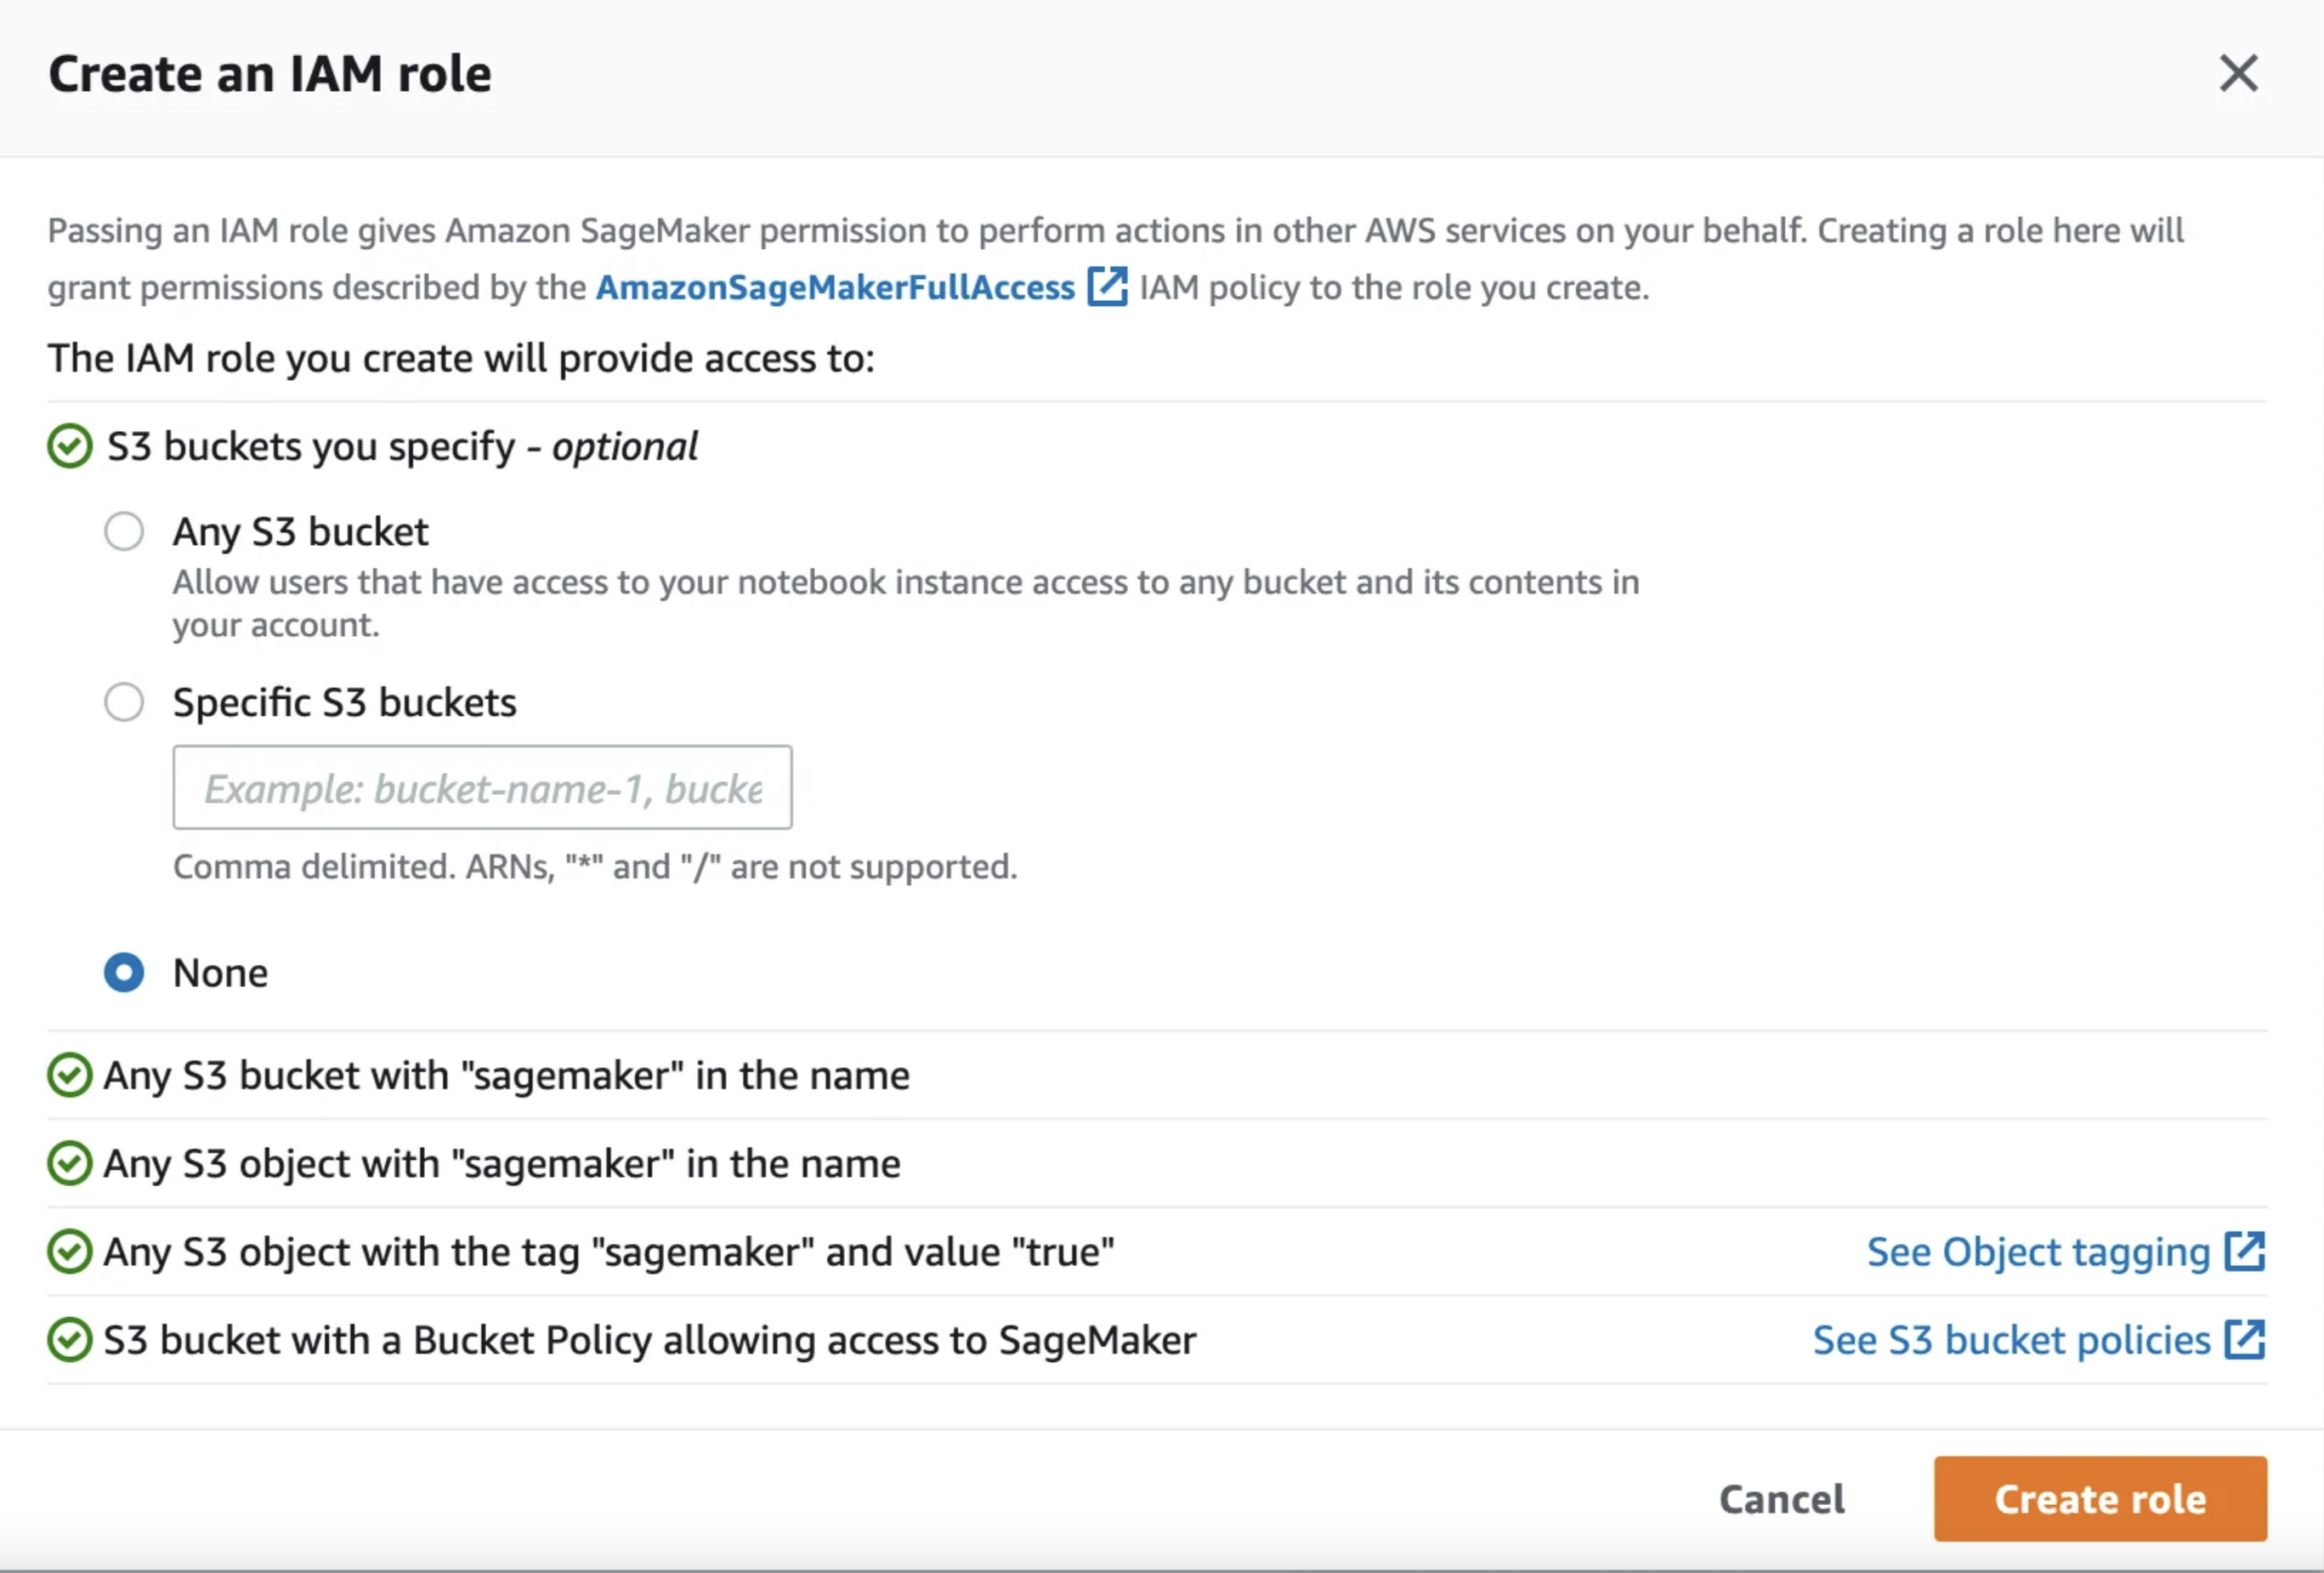
Select “Create a new role” from the drop down and you should see something like below. Select None SageMaker studio will create a bucket for us and we’ll use that for this tutorial. If you have another bucket you’d rather use feel free to enter it in the Specifc S3 buckets field.
Deploy a Vanilla Transformer Model
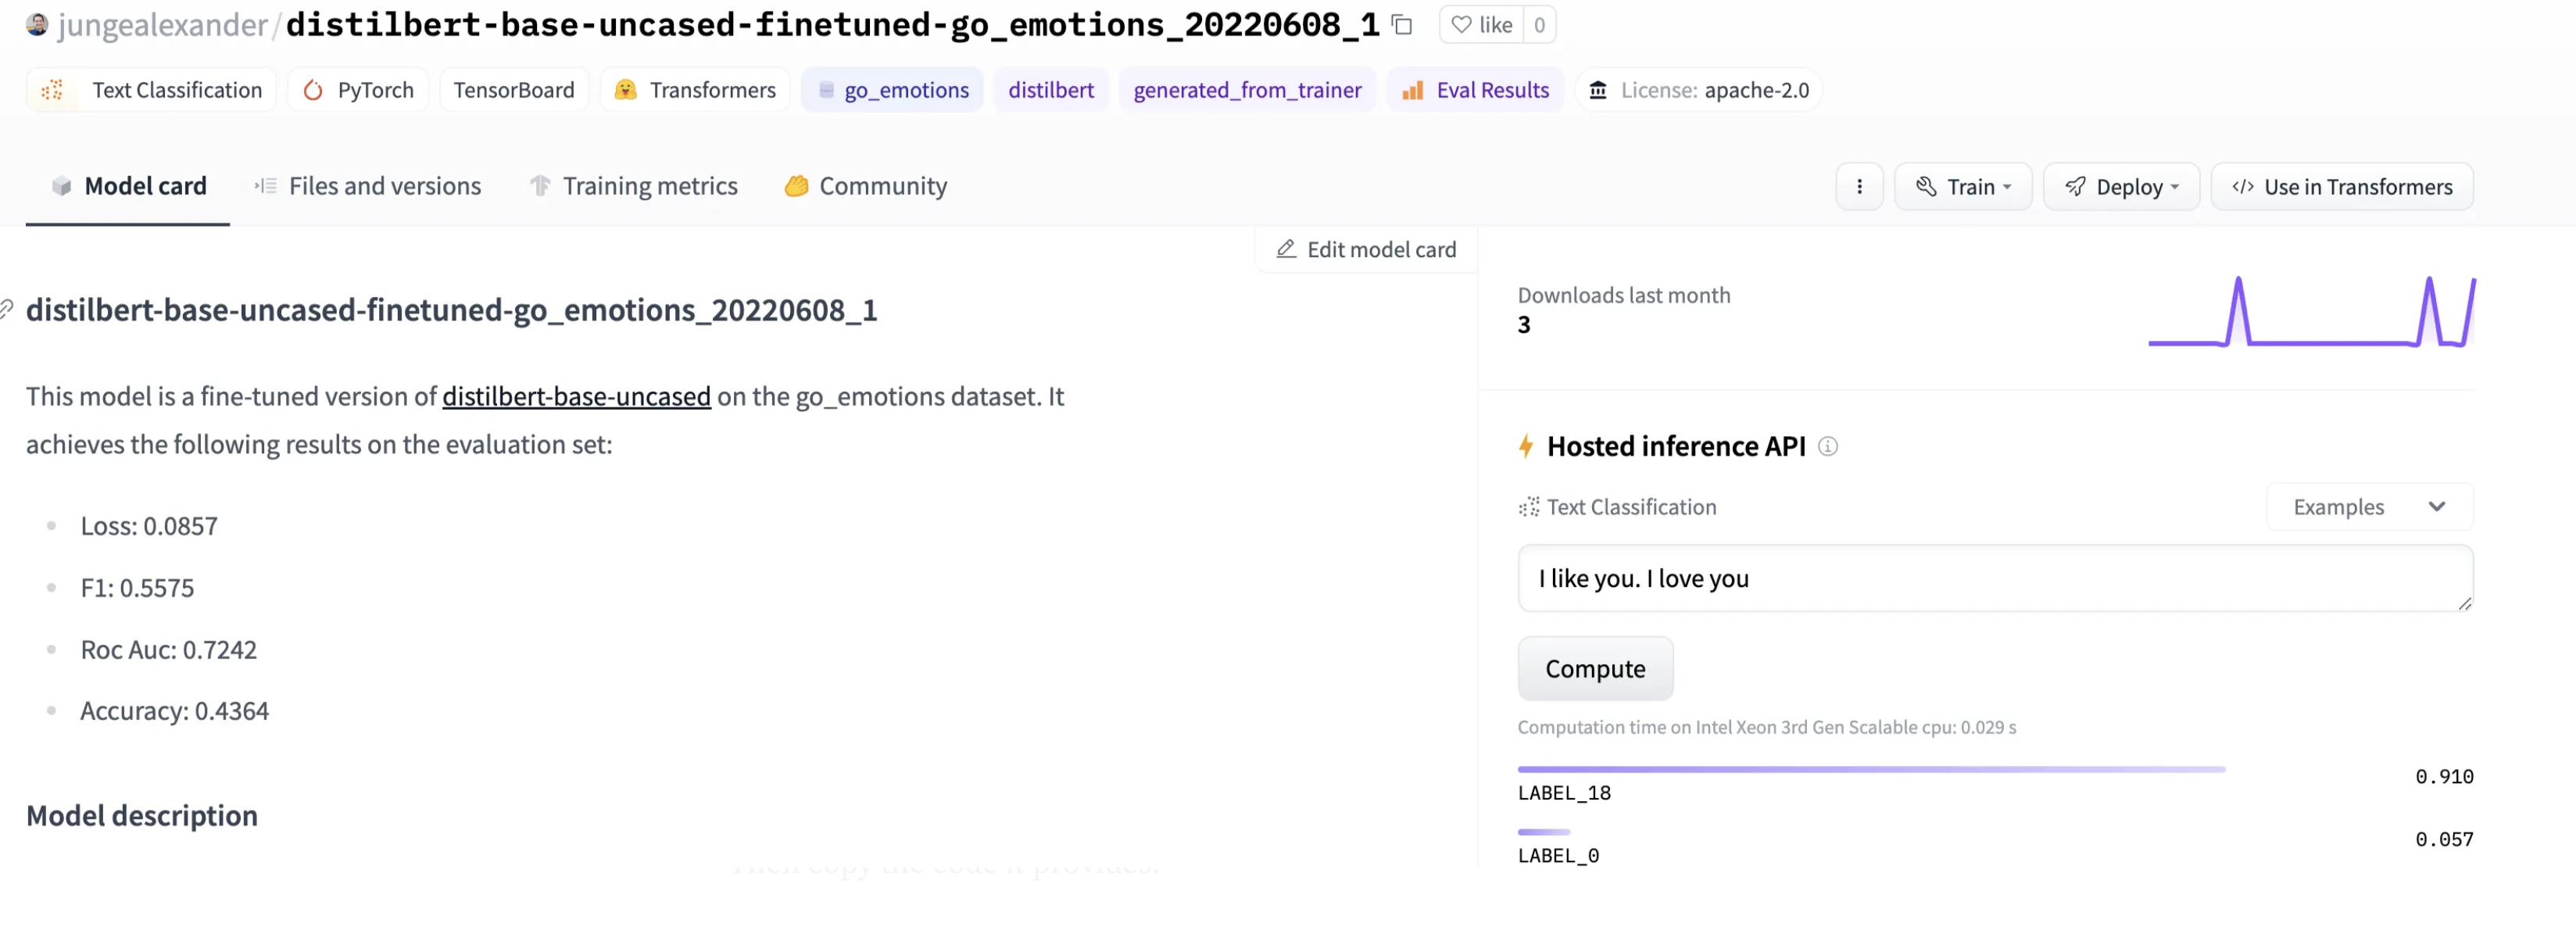
Now that SageMaker is set up we’re ready to deploy our first transformer model. I almost feel bad calling it a vannilla model. Partly because vanilla is a great flavor, but mainly because these models and the infrastructure needed to deploy them are complex. A few years ago this was really really hard. I’m blown away every day at how much progress we’ve made in such a short time. Anyway rant aside, for this tutorial we’re going to deploy a distilbert model finetuned on go_emotions. This is a good model to work with because it’s a little smaller and multilabel so we have to do a little bit to get it to return everything.
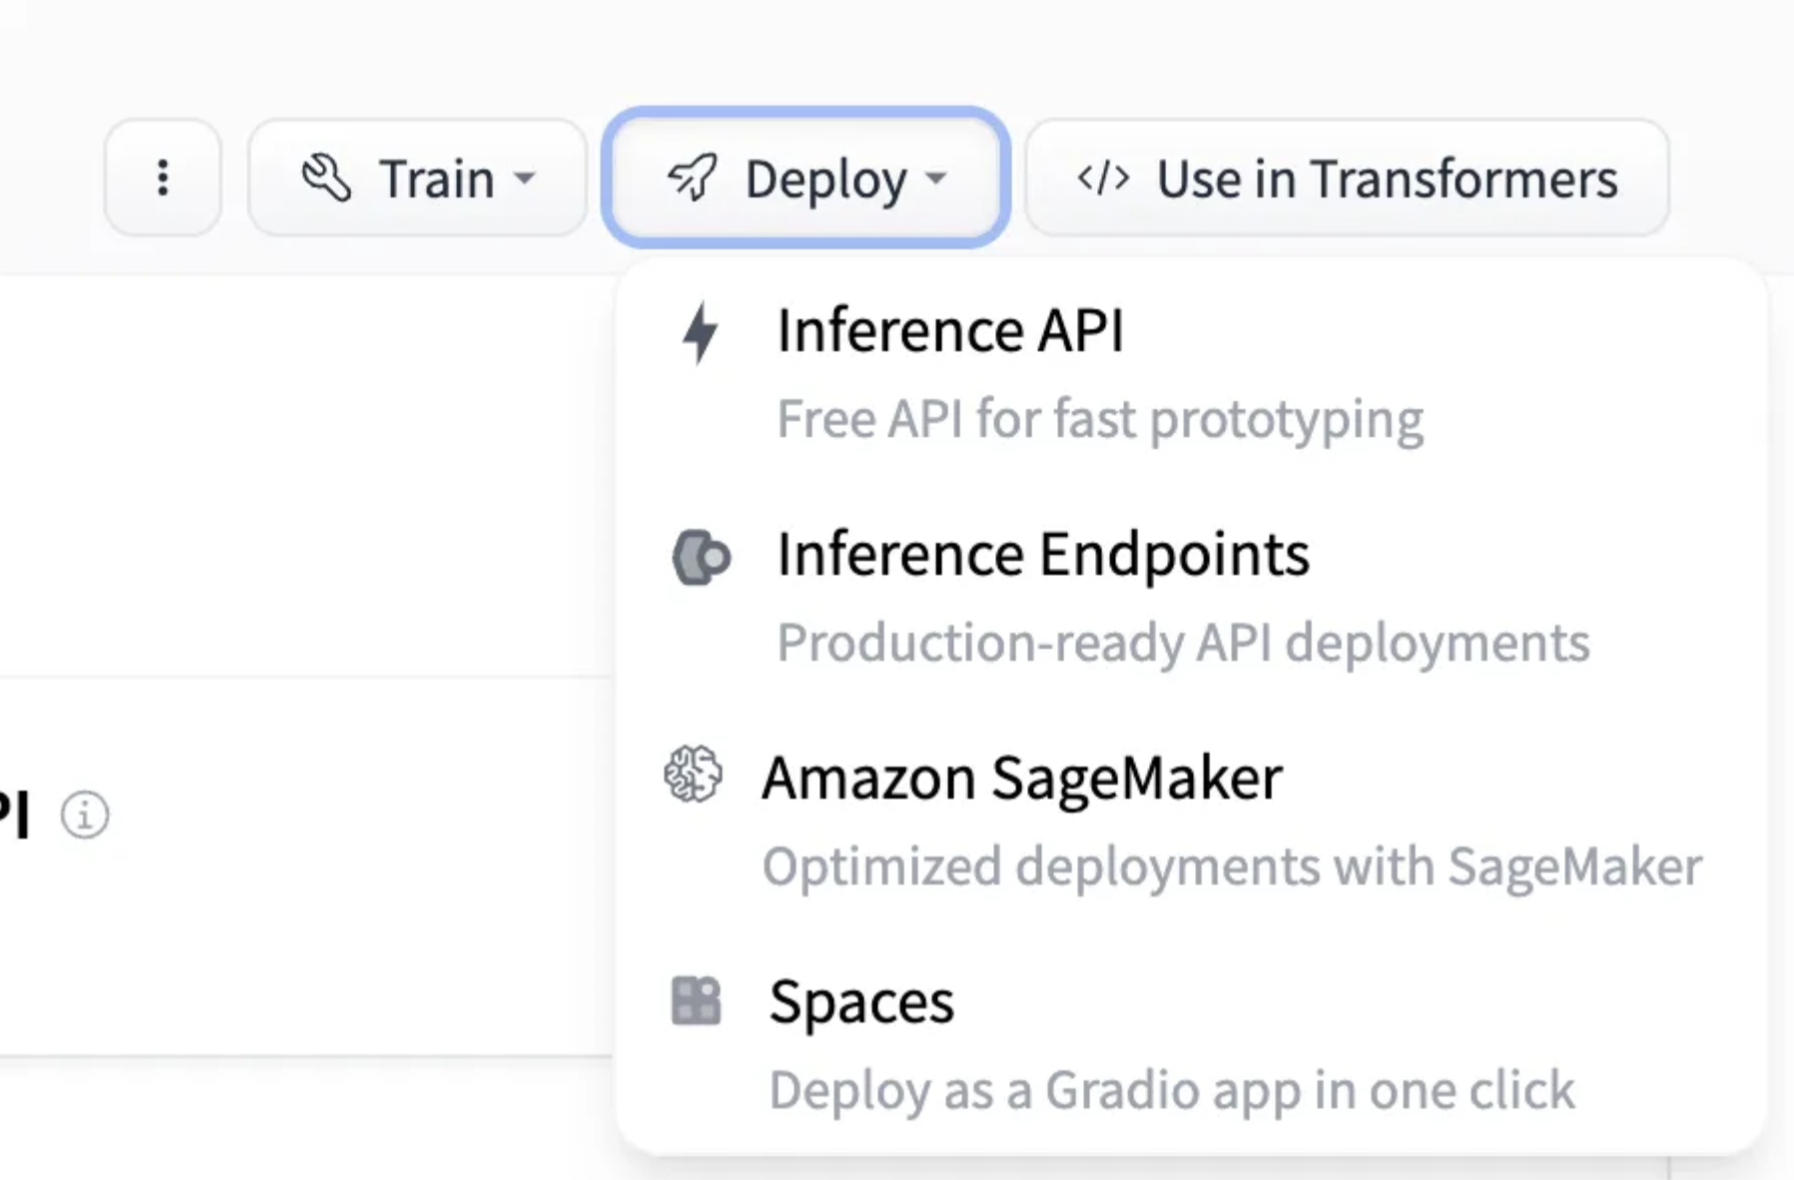
Head over to the model’s page on HuggingFace and click on the Deploy button in the top right corner.
From the drop down select Amazon SageMaker
Select the Text Classification task and the Local Machine configuration. Then copy the code it provides.
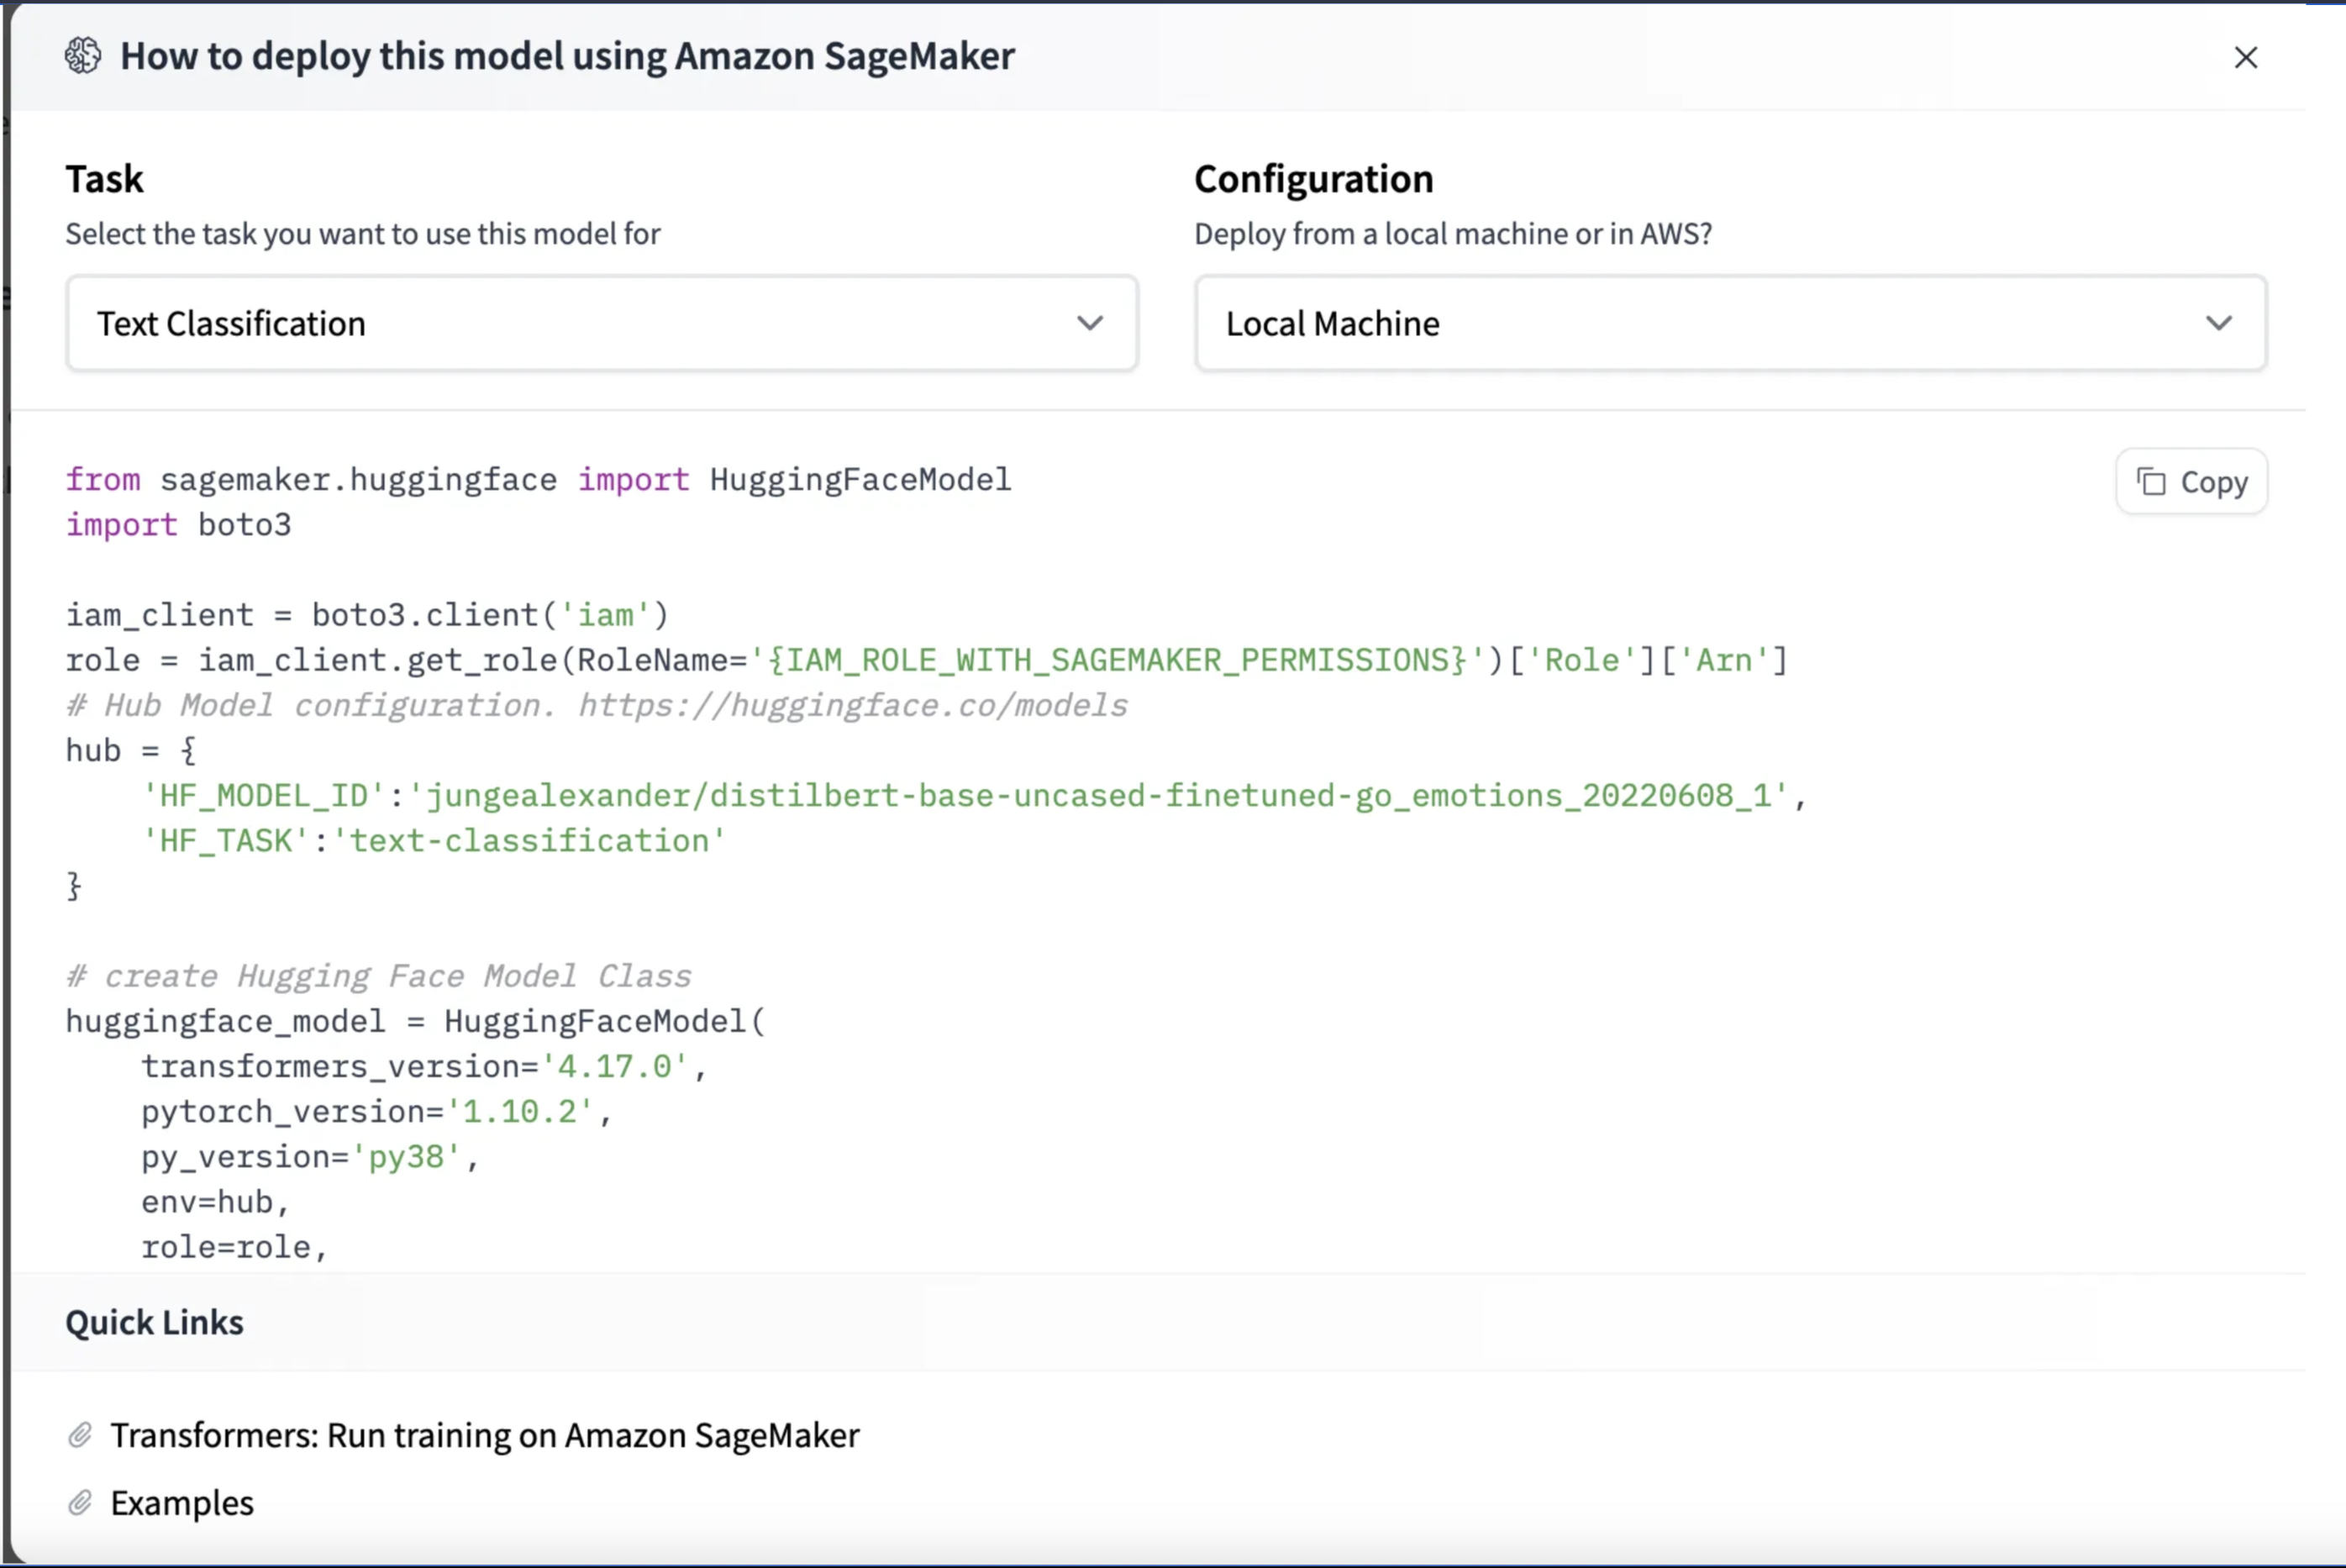
It is pretty incredible that HuggingFace will generate the code that you need to do a SageMaker deployment.To run this make sure to install the necessary libraries.
pip install sagemaker
Once that’s installed we need to change this line to have the correct name of our SageMaker role that we created in the previous section:
role = iam_client.get_role(RoleName='{IAM_ROLE_WITH_SAGEMAKER_PERMISSIONS}')['Role']['Arn']
The iam_client will grab the arn of the execution role if you know the name. I usually just copy the arn directly from SageMaker. To copy it directly from the web UI, on the domains page click on your domain.
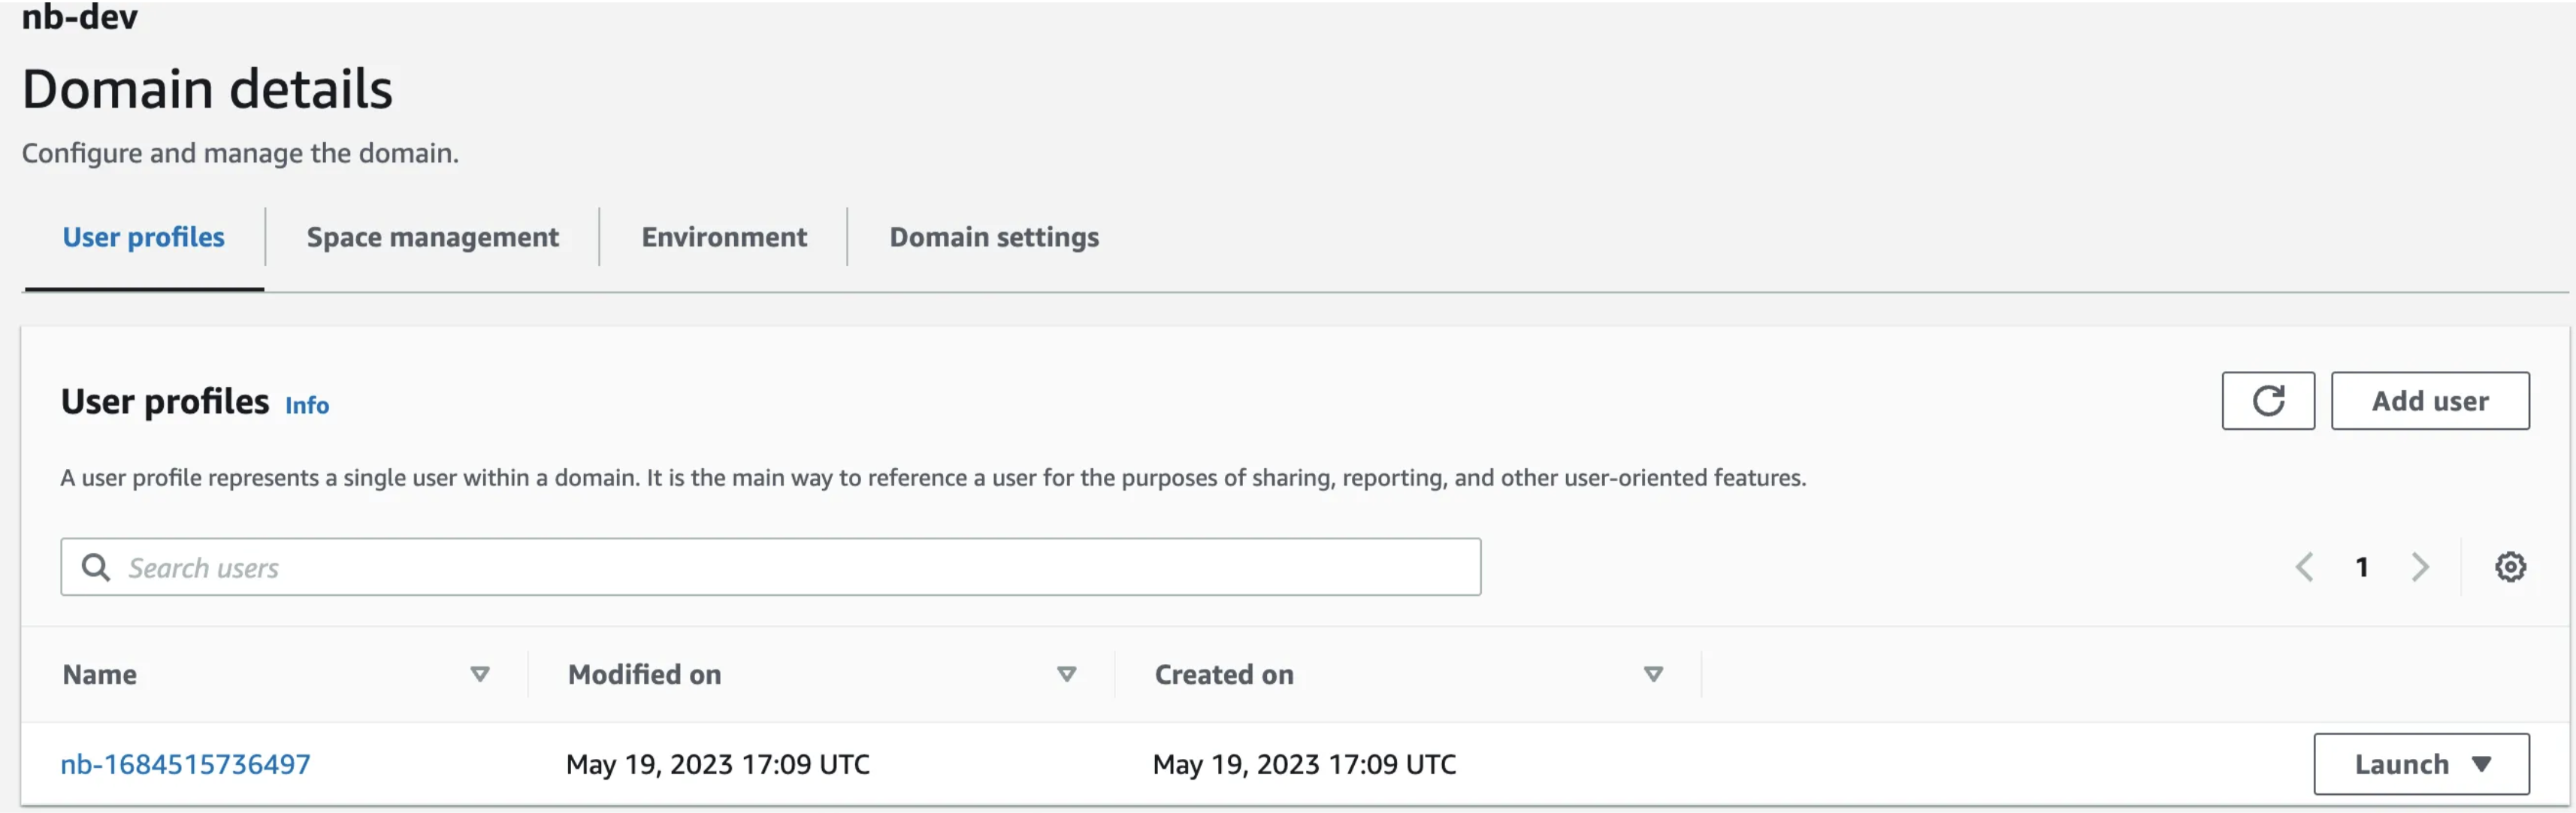
Then on the right side you’ll see your execution role arn.
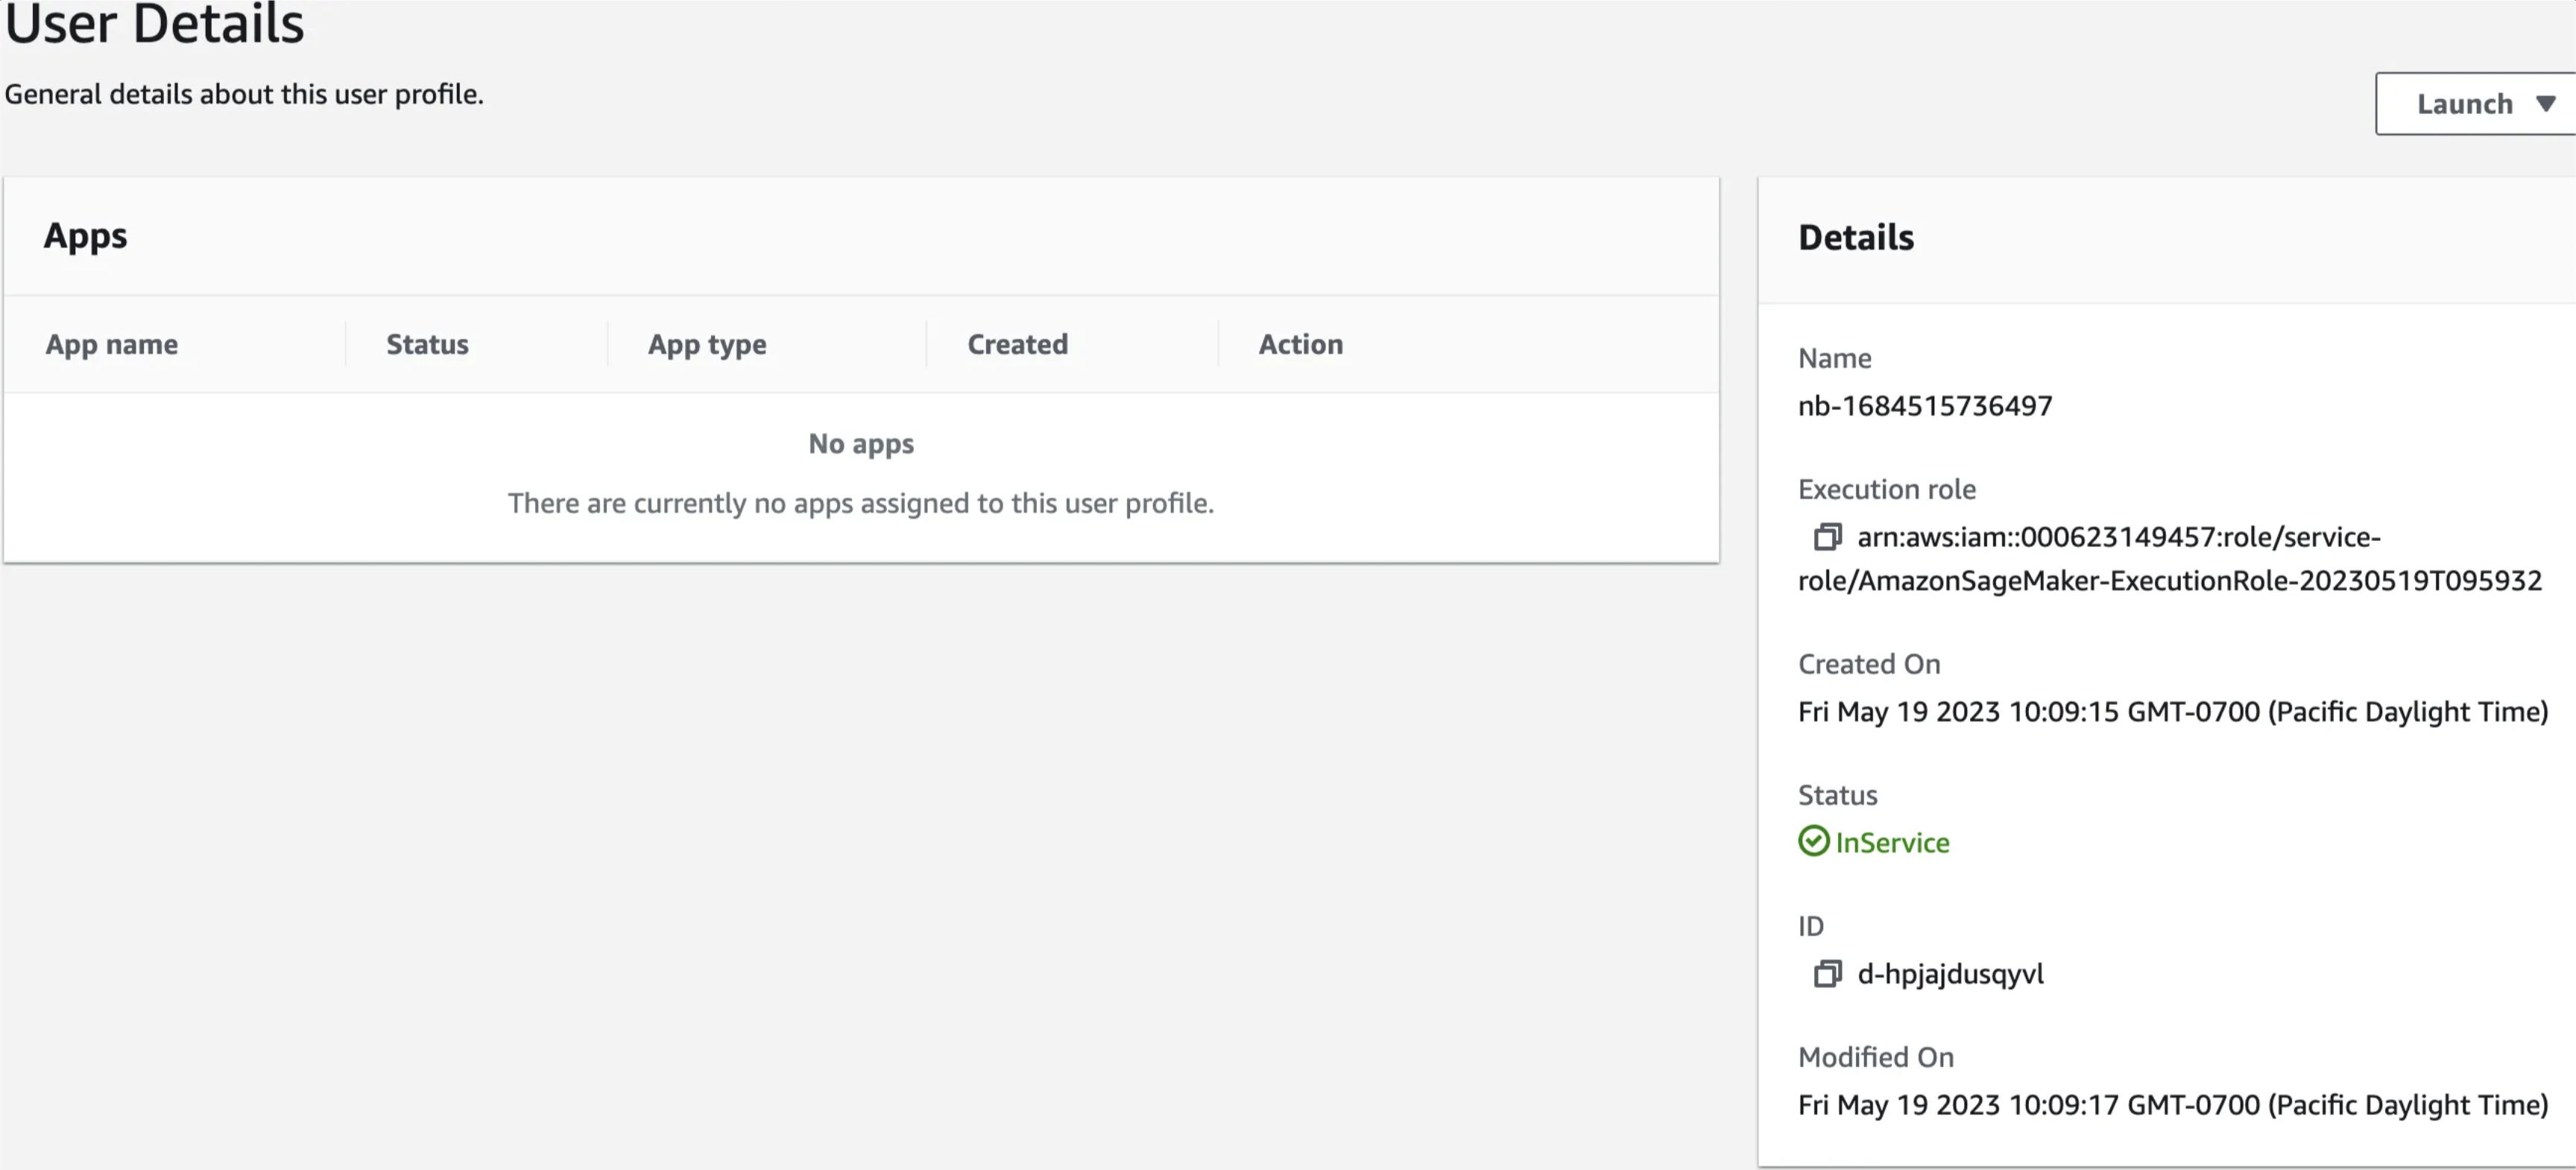
Copy the arn and update the code
role = "arn:aws:iam::000623149457:role/service-role/AmazonSageMaker-ExecutionRole-20230519T095932"
Now you’re ready to run the code. It took about 2 minutes for mine to execute and make a prediction.

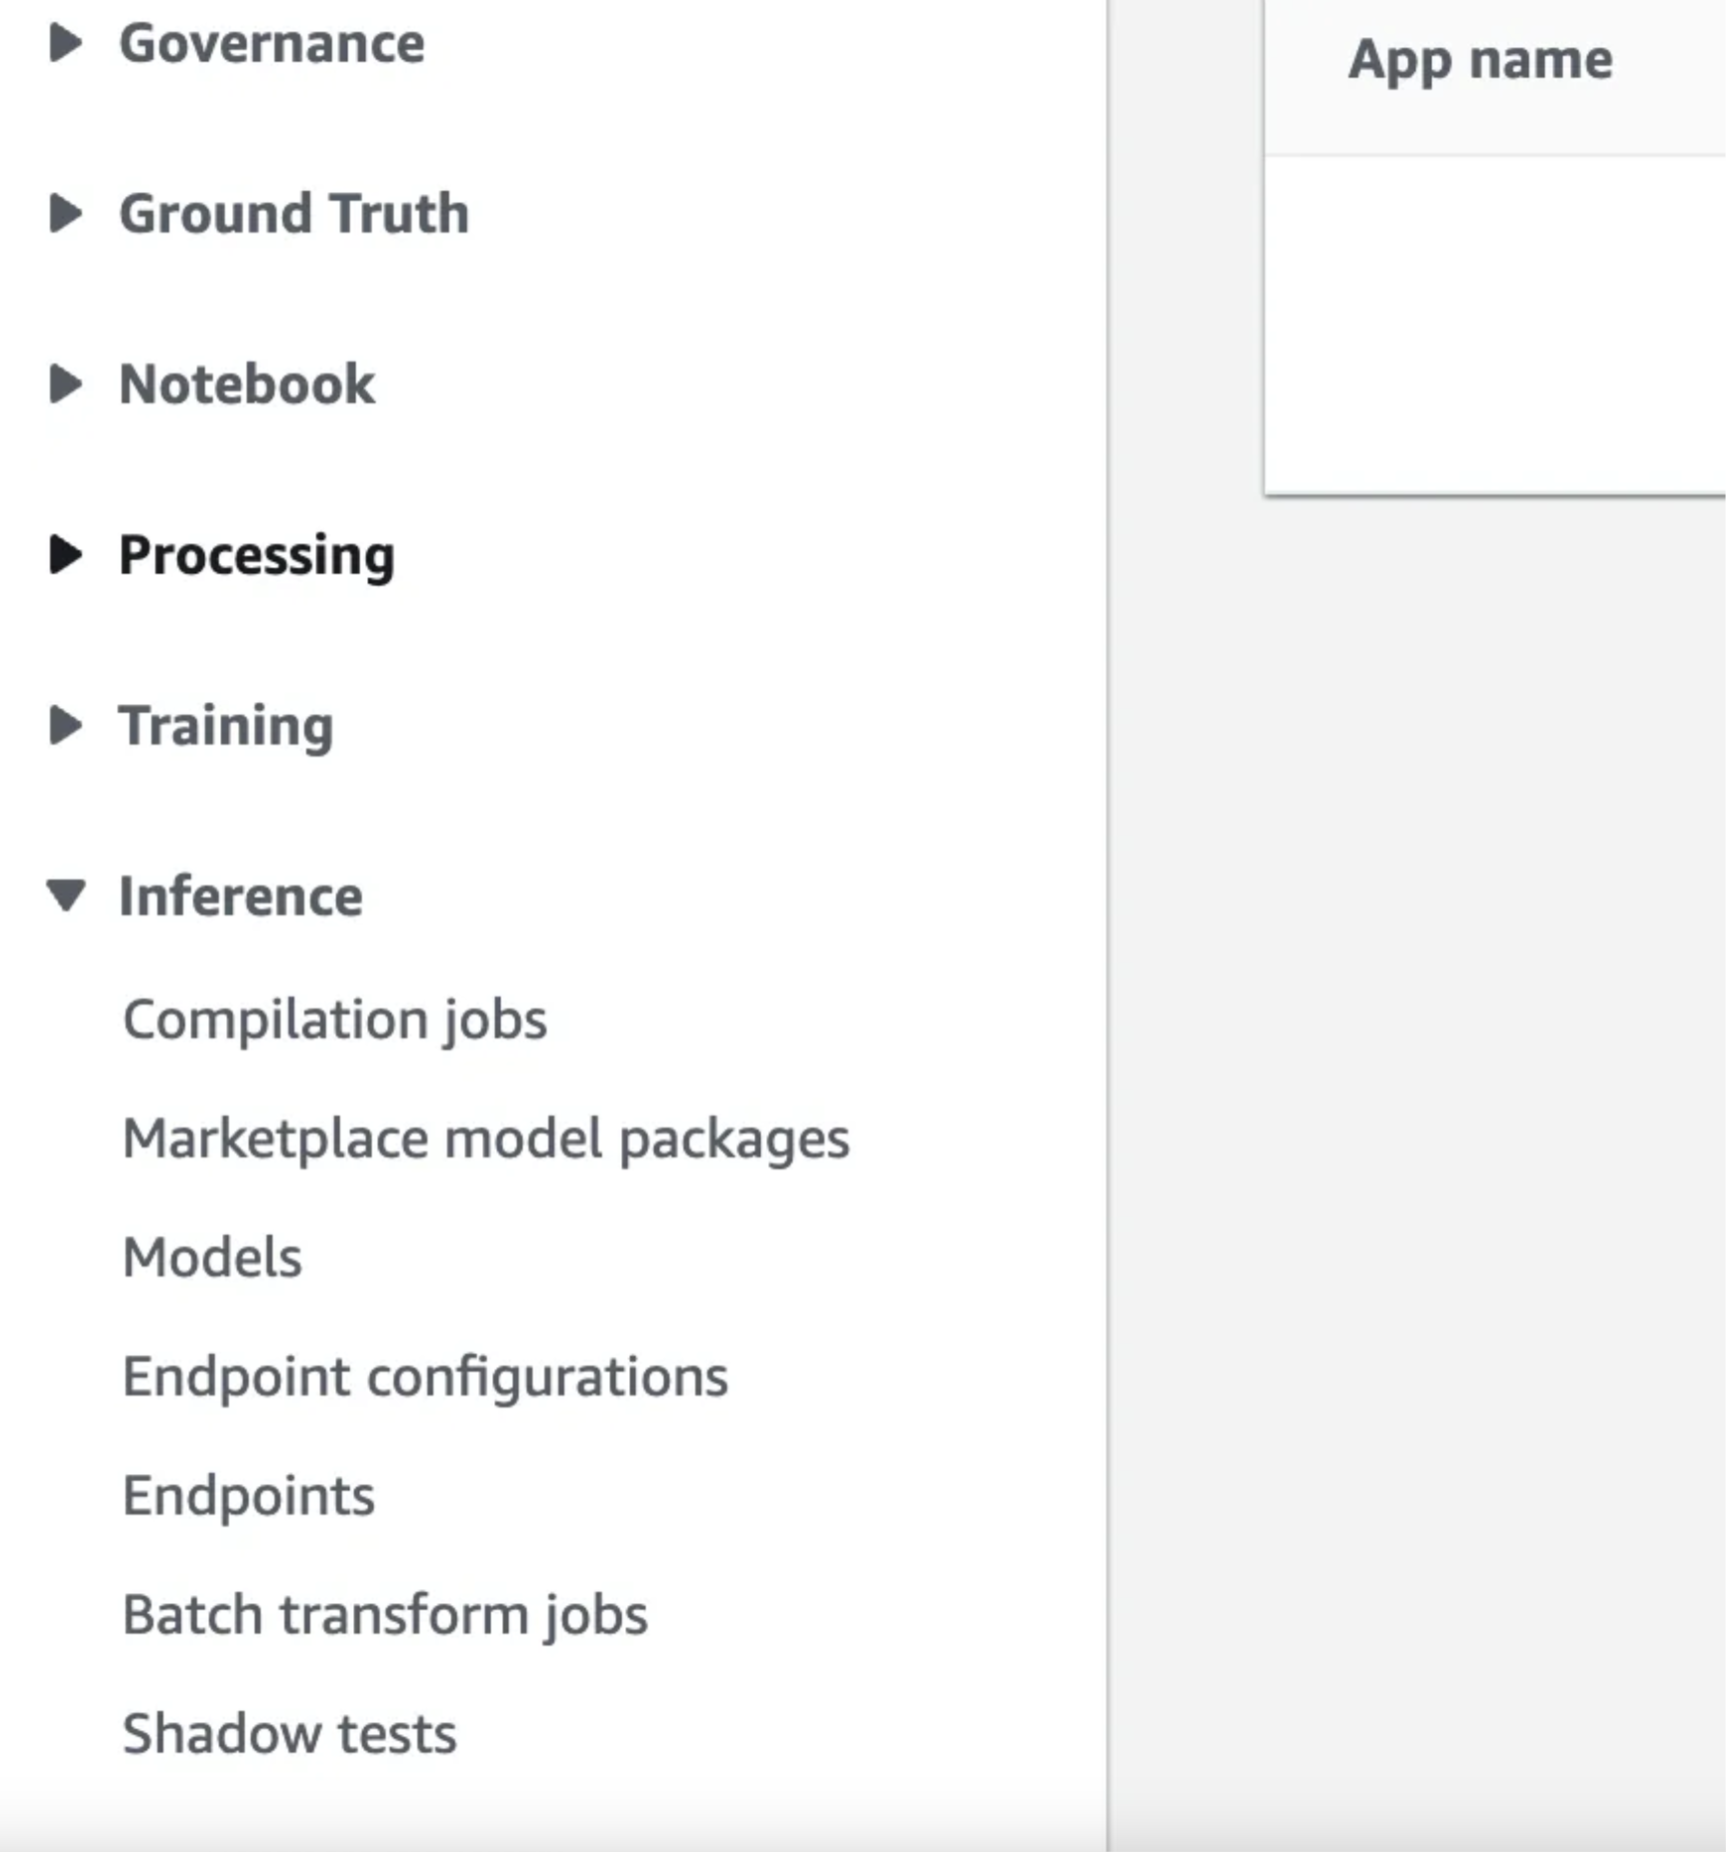
To see your model in the AWS UI click on the Inference dropdown on the left and then select Endpoints

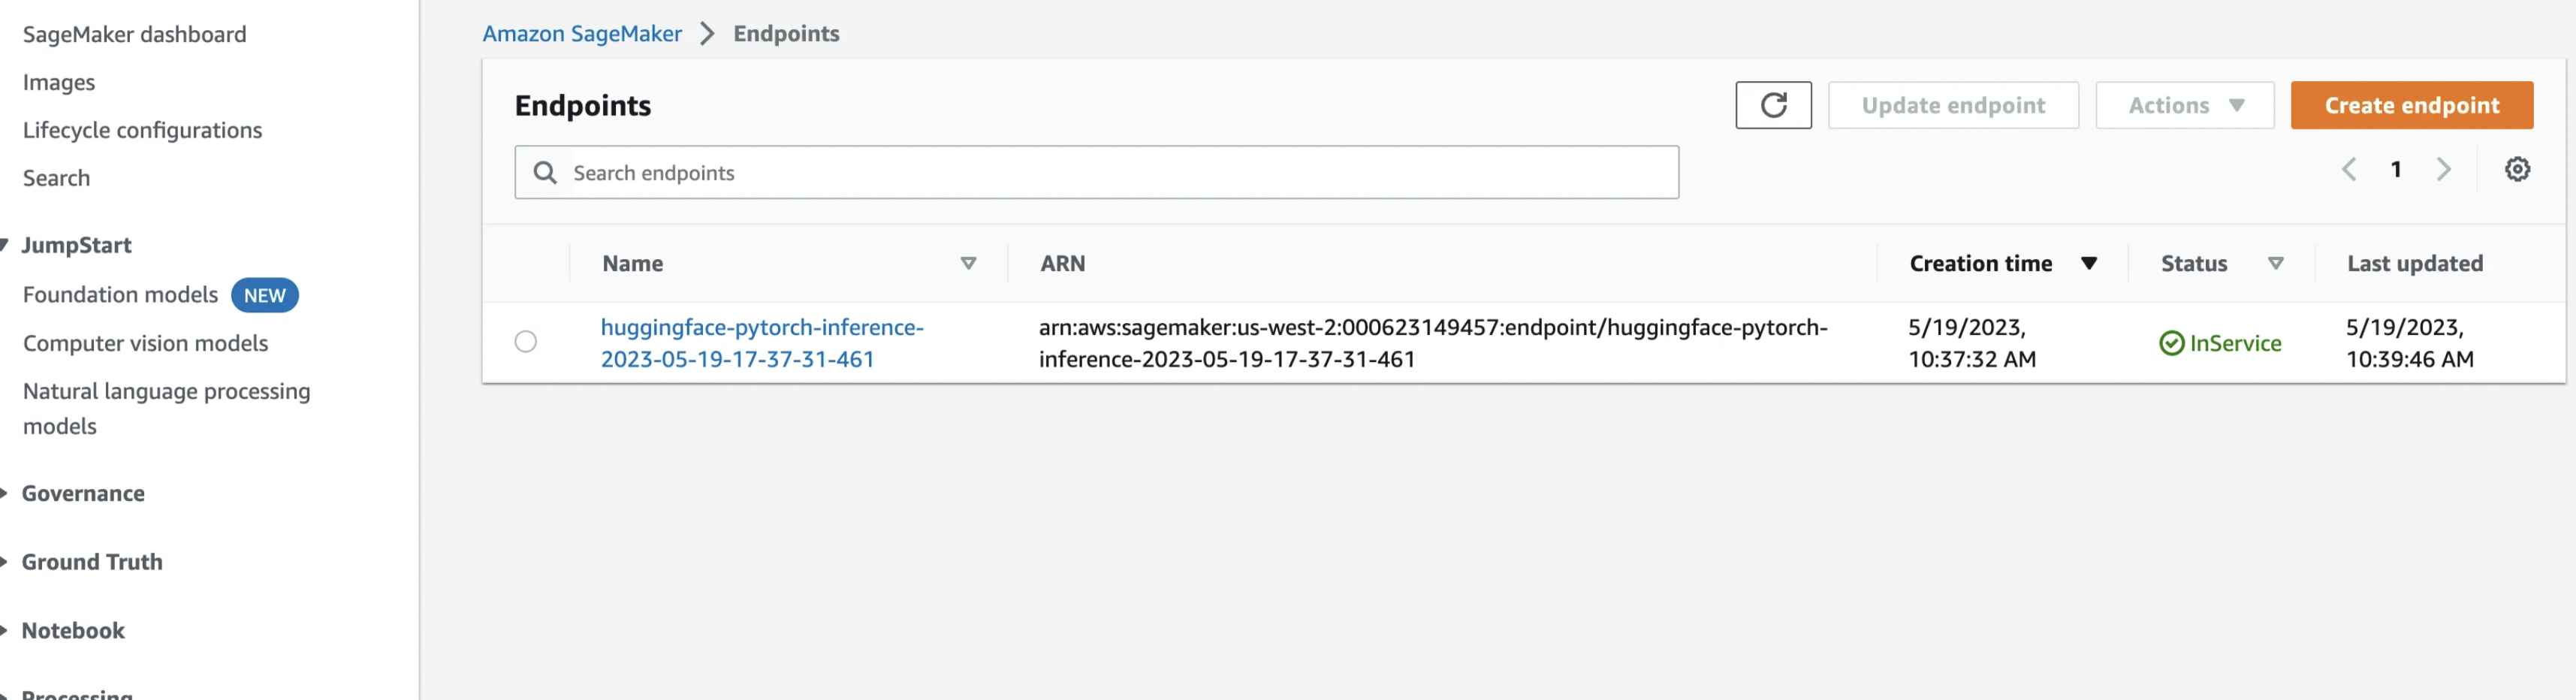
You should see something like the following.
Congrats you’ve deployed a transformer model! This model is running on an ml.m5.xlarge server which is always up and will incur costs ($0.23 / hr). To delete the endpoint click on it and then the big delete button in the top right, but before doing that let’s run some timing experiments.
In a Jupyter notebook we can run a very basic timing experiment with the returned predictor:
%%timeit
predictor.predict({
 'inputs': ["I like you. I love you"] * 128
})
Which for me yields:
5.8 s ± 38.8 ms per loop (mean ± std. dev. of 7 runs, 1 loop each)
So to predict on a 128 examples it takes about 5.8 seconds. Which is pretty fast! Let’s make it even faster using ONNX!
ONNX Optimization
ONNX is an incredible library for optimizing, sharing, distributing, and running deep learning models. It provides many tools that can make our models easier to share and faster to run on CPUs. Torch and the transformers library come with some very helpful methods for converting models to the ONNX format.
In this section we’ll use two main techniques to improve the performance of our models the first is optimization the second is quantization. In optimization we combine layers , or precompute constants and store them instead of doing it at runtime. These operations make inference faster. There are many flags and ways to approach optimization. I recommend playing around with the settings. Quantization is a strategy for reducing model size and improving performance by converting floating points to small integers. The integers take up less memory and CPUs have better integer arithmetic performance. With these tools in our toolbox we can improve our deployments dramatically.
Let’s convert this emotions model to ONNX and see what speedups we can get! To perform the conversion and optimization we’ll need the Optimum library. Install that with:
pip install "optimum[exporters]"
We use the Optimum library to load in our transformer model and then dynamically quantize it. There are two main flavors of quantization, dynamic and static. Dynamic is done on the fly so we can apply it to any model without much work, whereas static learns better parameters for the quantization. There is a good blog post on performing static quantization if you are interested here.
from optimum.onnxruntime import ORTQuantizer, ORTModelForSequenceClassification
from optimum.onnxruntime.configuration import AutoQuantizationConfig

model_path = "/Users/tetracycline/models/emotions"
model_name = "jungealexander/distilbert-base-uncased-finetuned-go_emotions_20220608_1"

model = ORTModelForSequenceClassification.from_pretrained(model_name,
                                                          from_transformers=True,
                                                          export=True)

quantizer = ORTQuantizer.from_pretrained(model)

dqconfig = AutoQuantizationConfig.avx512_vnni(is_static=False, per_channel=False)

model_quantized_path = quantizer.quantize(
    save_dir=f"{model_path}/onnx",
    quantization_config=dqconfig,
)
This code will save the quantized ONNX model in the onnx folder on the model_path we defined. This helpful function saves everything that we need to load in and run this model, and almost everything that we need to upload it to SageMaker.
We can load in our newly quantized model and give it a run with the following code:
tokenizer = AutoTokenizer.from_pretrained(f"{model_path}/onnx")
model = ORTModelForSequenceClassification.from_pretrained(f"{model_path}/onnx")
inputs = tokenizer("What am I using?", "Using DistilBERT with ONNX Runtime!", return_tensors="pt")
outputs = model(**inputs)
We’ve quantized and optimized our first model! This model is smaller (170MB vs 500MB) and has some nice properties for deployment.
Create an Inference Handler
To deploy our ONNX model to SageMaker we need to tell it how to make predictions and handle input. SageMaker uses a script called inference.py to handle these inputs. We will create one which works with ONNX. Our script needs to implement two functions a model_fn which loads in our model and a tranform_fn which applies our model to the incoming data.
import json
from typing import Any, Dict, List
from transformers import AutoTokenizer, pipeline
from optimum.onnxruntime import ORTModelForSequenceClassification

def model_fn(model_dir=None):
    pass

def transform_fn(model, input_data, content_type, accept) -> List[List[Dict[str, Any]]]:
    pass
The model_fn takes a path from SageMaker to the location of our model artifcats. All we have to do here is take that path and pass it into the appropriate pipeline definitions from the optimum.onnxruntime library. This code uses that path to instantiate the saved tokenizer and ONNX model and then passes them to a transformers pipeline. You’ll notice the top_k argument in the pipeline. This sets the pipeline to return the predictions for all the classes. I like to set this parameter when working with models because it let’s me choose how to work with the model outputs on the frontend. If you just want the top prediction you can remove this.
def model_fn(model_dir=None):
    """
    Load in the model from the container and prepare it for predictions.

    Sagemaker will pass this the base directory created from unziping model.tar.gz.
    This happens once on the startup of the service.

    :param model_dir: The directory containing model.onnx and associated files. This is
        the path created from SageMaker unziping model.tar.gz.
    :return pipe: The transformers pipeline with the ONNX model.
    """
    tokenizer = AutoTokenizer.from_pretrained(model_dir)
    model = ORTModelForSequenceClassification.from_pretrained(
        model_dir, file_name="model.onnx"
    )
    pipe = pipeline("text-classification", model=model, tokenizer=tokenizer, top_k=None)
    return pipe
When SageMaker starts up a new instance it runs the model_fn function first to load in the model. It will pass the output of model_fn as the named parameter model to successive functions. When we hit the SageMaker endpoint SageMaker calls the transform_fn function. This is the main workhorse and manages the input and calling the model.
def transform_fn(model, input_data, content_type, accept) -> List[List[Dict[str, Any]]]:
    """Load in the data and run predictions.

    :param model: The output of model_fn which is the transformers pipeline.
    :param input_data: The incoming payload in the format specified by `content_type`.
    :param content_type: The format of the incoming data.
    :return: The predictions from the model returned to the user.
    """
    data = json.loads(input_data)
    return model(data["inputs"])
Deploy the Model
To perform the deployment we need to package all this code and our model into a single file called model.tar.gz and upload it to S3. The onnx folder we created earlier in this tutorial has almost everything that we need in it. It is missing a folder called code which tells SageMaker how to handle our custom model operations. Create the code folder in the onnx folder from earlier and add inference.py to it. This script is what SageMaker will use to load and run our models on the endpoint. We also need to create a requirements.txt file with the following line in it:
optimum[onnxruntime]
On endpoint startup if there is a requirements.txt file present SageMaker will install the necessary libraries. In this case we are using optimum to run our ONNX model and therefore need this library installed. The final folder should have the following structure:
model/
    |- config.json
    |- model.onnx
    |- ort_config.json
    |- special_tokens_map.json
    |- tokenizer_config.json
    |- tokenizer.json
    |- vocab.txt
    |- code
      |- inference.py
      |- requirements.txt
Zip the folder up into a file called model.tar.gz and we’re ready to deploy. You can use the following Python to do that:
import tarfile
import os

tar_dir = "/path/to/your/folder"
output_file = "model.tar.gz"
with tarfile.open(output_file, "w:gz") as tar:
    tar.add(tar_dir, arcname=os.path.sep)
Upload this model.tar.gz file to the s3 bucket created by SageMaker and copy the path. For me it was s3://nb-sagemaker-dev/model.tar.gz. With the role from above we can deploy the model in the same way as before with one minor tweak. Add a model_data field which takes the path to our model.tar.gz file.
from sagemaker.serverless import ServerlessInferenceConfig
from sagemaker.huggingface import HuggingFaceModel

role = "arn:aws:iam::000623149457:role/service-role/AmazonSageMaker-ExecutionRole-20230519T095932"

# create Hugging Face Model Class
huggingface_model = HuggingFaceModel(
    model_data="s3://nb-sagemaker-dev/model.tar.gz",  # path to your trained SageMaker model
    role=role,  # IAM role with permissions to create an endpoint
    transformers_version="4.17.0",  # Transformers version used
    pytorch_version="1.10.2",  # PyTorch version used
    py_version="py38",
)

# deploy model to SageMaker Inference
predictor = huggingface_model.deploy(
    endpoint_name="emotions-onnx",
    initial_instance_count=1,
    instance_type="ml.m5.xlarge"
)
This should take about four minutes to deploy. Once it’s done Now test our new deployment the same way as before in a Jupyter notebook run:
%%timeit
predictor.predict({
 'inputs': ["I like you. I love you"] * 128
})
The results from the above code for me are:
1.2 s ± 194 ms per loop (mean ± std. dev. of 7 runs, 1 loop each)
Our pure transformrers model took 5.8 to run 128 predictions this ONNX optimized model only takes 1.2s! That’s almost 5 times faster!!!
Conclusion
We can realize a 5x speedup in inference with very little extra work using ONNX. For more information on deploying HuggingFace models to SageMaker see this walkthrough.
Note
In the above article I mostly used the predictor class that is returned when deploying these models. This is convenient but not very helpful when you want to call the model from somewhere that isn’t right where you deployed the model. To invoke the model without the predictor class you need to:
-
Instantiate a
sagemaker-runtimeboto3 client in the region you’ve deployed your model. -
Create a payload dictionary with the correct keys and values. For us, our
inference.pyexpects a json object with a key calledinputs -
use the
invoke_endpointon the client with the appropriate payload -
Read the results.
The below code will take care of this for you.
import json
import boto3

client = boto3.client("sagemaker-runtime", region_name="us-west-2")

endpoint_name = "emotions-onnx"
payload = {
    "inputs": ["I like you, I love you."] * 128,
}

response = client.invoke_endpoint(
    EndpointName=endpoint_name,
    ContentType="application/json",
    Accept="application/json",
    Body=json.dumps(payload),
)
print(response["Body"].read().decode())
Happy building : ).