Making a Deep Learning App for iOS in 5 minutes
Introduction
Howdy, Deep learning is really hot right now and people seem to like iPhones. Let’s put them together :). A while back there weren’t many tutorials on how to do this, now there are quite a few more. I’d like to add to the space with a maximally efficient minimal working example. We’re going to build a deep learning iOS app which classifies CIFAR10 in 5 minutes. If you’d like to see a live code demonstration of this tutorial please checkout my youtube video.
Appeal to Reader
If you pay for Medium, or haven’t used your free articles for this month, please consider reading this article there. I post all of my articles here for free so everyone can access them, but I also like beer and Medium is a good way to collect some beer money : ). So please consider buying me a beer by reading this article on Medium.
Installs
Make sure you have keras, coremltools, and xcode before getting started. You can install them by buying a mac and then running:
pip install keras & coremltools
Train the Model
We don’t have time to design a model from scratch! We only have 5 minutes! Let’s just steal this one. If you’re familiar with keras you’ll see that it’s just loading in the CIFAR dataset and then training a simple CNN on it. We need to make a few adjustments to complete this tutorial quickly. First, change the number of epochs on line 18 to only 1. This will mean that our model should finish training in about 3 minutes on my Macbook Pro. Next change the data_augmentation parameter on line 19 to False. Lastly, get rid of lines 103-113 we don’t need to save our model and we don’t need to (want to) know how good (bad?) it is. We just need a fast model!
batch_size = 32
num_classes = 10
epochs = 1
data_augmentation = False
num_predictions = 20
save_dir = os.path.join(os.getcwd(), 'saved_models')
model_name = 'keras_cifar10_trained_model.h5'
One last thing before we start training. We need to get this trained model in to a form that Steve Jobs can understand. To do that we go to Apple for guidance. At the bottom of the page you will see a Convert Model Section steal those lines of code pasted them at the bottom of our stolen keras model file. We need to make a few small changes to have them work with keras models. Update them as below.
import coremltools
coreml_model = coremltools.converters.keras.convert(model, input_names=['image'], image_input_names='image', class_labels=['airplane', 'automobile' ,'bird ','cat ','deer ','dog ','frog ','horse ','ship ','truck'])
coreml_model.save('CIFAR.mlmodel')
If you saved this in a file called mlcore_convert.py then to start the model cooking you just have to run:
python mlcore_convery.py
Build an iOS App
While our model is simmering let’s build an iOS app for classifiying images. I don’t have time to design an App so I’m just going to steal one that Apple approves of. This command will download an iOS Xcode project that uses a model for image classification.
wget https://docs-assets.developer.apple.com/published/a6ab4bc7df/ClassifyingImagesWithVisionAndCoreML.zip
unzip ClassifyingImageswithVisionandCoreML.zip
People seem to like Apple so it can’t be too bad right? Now just open up this fancy new Xcode project and we’re done with our App!
(Note sometimes Apple likes to change the name of their links for no reason so if the above wget command doesn’t work you can also download this Xcode project here)
Fix the Broken Stuff
There are a few things with this app that we need to deal with.
-
We need to add our newly trained model to the Xcode project and update the code to use our model instead.
-
The picture size used in CIFAR is different than that taken by your iPhone. We need to scale the images.
1. Add the Model
Let’s incorporate our new model! Change line 30 of ImageClassificationViewController.swift to:
let model = try VNCoreMLModel(for: CIFAR().model)
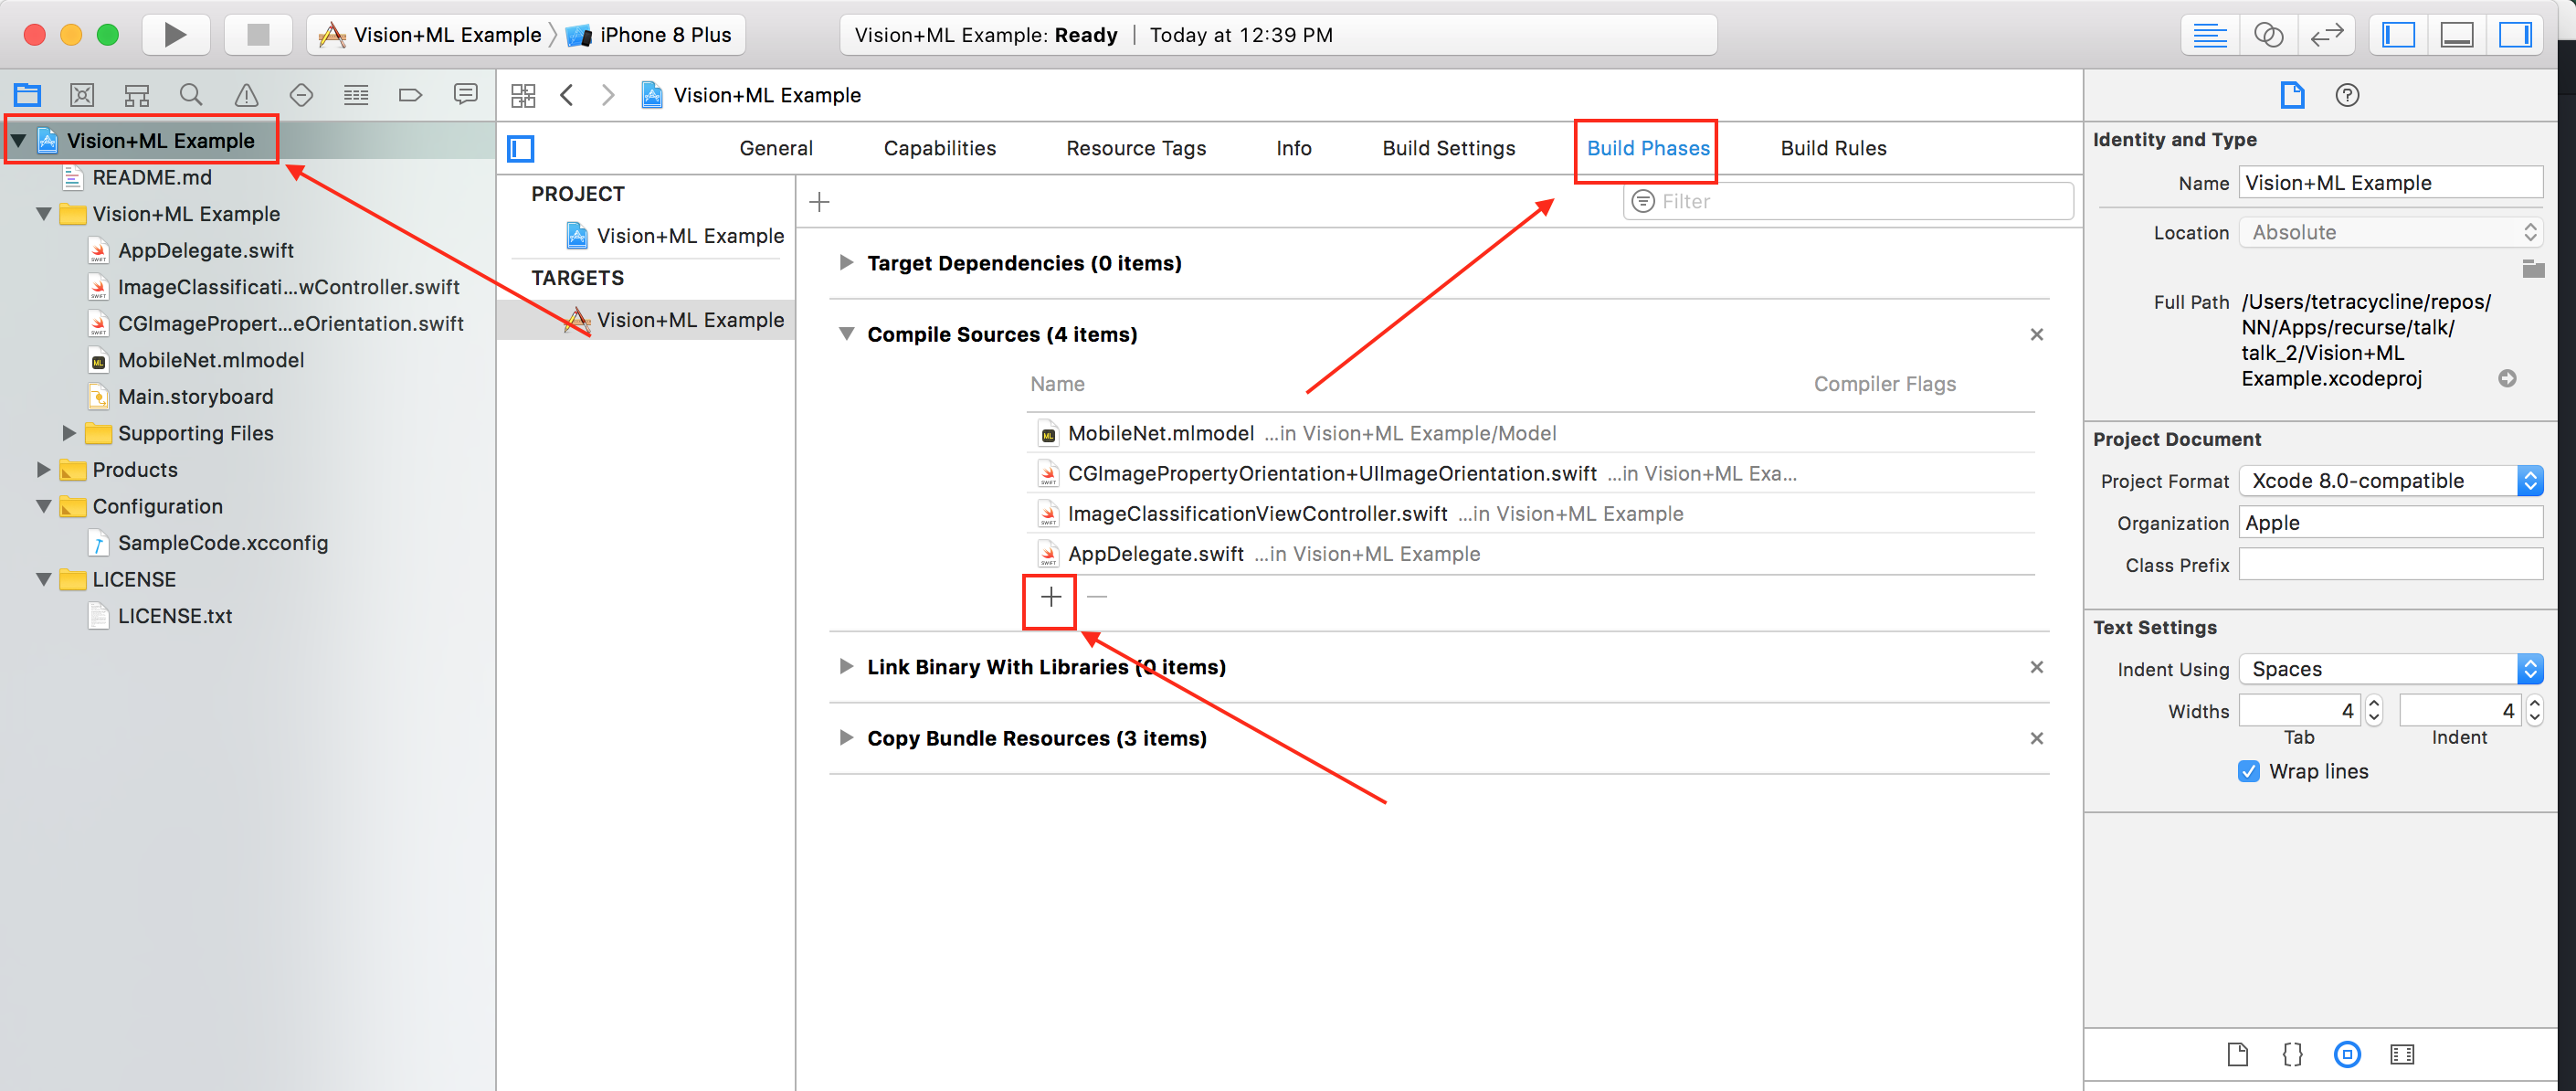
Now copy the new model we just trained with keras to Vision+ML Example/Model/CIFAR.mlmodel and link
it using Xcode’s build phases.

2. Fix Sizing Issues
Now we need to add a function to resize the image the following function stolen from stackoverflow will do the trick:
private let trainedImageSize = CGSize(width: 64, height: 64)


func resizeImage(image: UIImage, targetSize: CGSize) -> UIImage {
    let size = image.size

    let widthRatio  = targetSize.width  / size.width
    let heightRatio = targetSize.height / size.height

    // Figure out what our orientation is, and use that to form the rectangle
    var newSize: CGSize
    if(widthRatio > heightRatio) {
        newSize = CGSize(width: size.width * heightRatio, height: size.height * heightRatio)
    } else {
        newSize = CGSize(width: size.width * widthRatio,  height: size.height * widthRatio)
    }

    // This is the rect that we've calculated out and this is what is actually used below
    let rect = CGRect(x: 0, y: 0, width: newSize.width, height: newSize.height)

    // Actually do the resizing to the rect using the ImageContext stuff
    UIGraphicsBeginImageContextWithOptions(newSize, false, 1.0)
    image.draw(in: rect)
    let newImage = UIGraphicsGetImageFromCurrentImageContext()
    UIGraphihttps://youtu.be/zd90QRTzcvIcsEndImageContext()

    return newImage!
}
Now we just need to call this new function in our App. Change the first few lines of updateClassifications to:
/// - Tag: PerformRequests
func updateClassifications(for image: UIImage) {
    classificationLabel.text = "Classifying..."

    let resizedImage = resizeImage(image: image, targetSize: trainedImageSize)

    let orientation = CGImagePropertyOrientation(resizedImage.imageOrientation)
    guard let ciImage = CIImage(image: resizedImage) else { fatalError("Unable to create \(CIImage.self) from \(resizedImage).") }
This will resize all images before running them through our model.
TADA!!!
We’re done! Just build the app now : ). You can put any simple keras model in to an iOS application. Try making the model better or classifying other things.