Color Based Object Tracking Using Open Kinect and Processing
Object Tracking
In order for a machine to interact with objects it needs to be able to see and identify them. One of the easiest ways for a computer to identify an object is with that objects color. In this tutorial I will walk you through how to do very basic object tracking using a kinect (v1) and processing. By the end of this post you should be able to threshold an image based on color, apply a very basic filter to the image, and track objects of specific colors in real time. Let’s get started!
Getting the Kinect working
This tutorial is done using the Kinect model number xxxx. I also saw that Daniel Shiffman and some other pretty bright people put together a library for using the Kinect with Processing. I wanted to give it a go so the language used here is Processing. For a good intro to the Kinect and processing see Daniel Shiffman’s post on getting the kinect up and running. Here we will focus on doing some other cool stuff with it. First off let’s load in the libraries
  import org.openkinect.freenect.*;
  import org.openkinect.processing.*;
  import blobDetection.*;
The first two allow us to interface with the Kinect and the last one is an excellent library for working with images in processing. Now that we have our libraries let’s initialize the Kinect and get some video going.
  void setup() {
    // Big enough to display two images side by side
    size(1280, 500);

    // Initialize the Kinect and its video feed
    kinect = new Kinect(this);
    kinect.initVideo();

    // Grab and display the current image
    currentImage = kinect.getVideoImage();
    image(currentImage, 0, 0);
  }
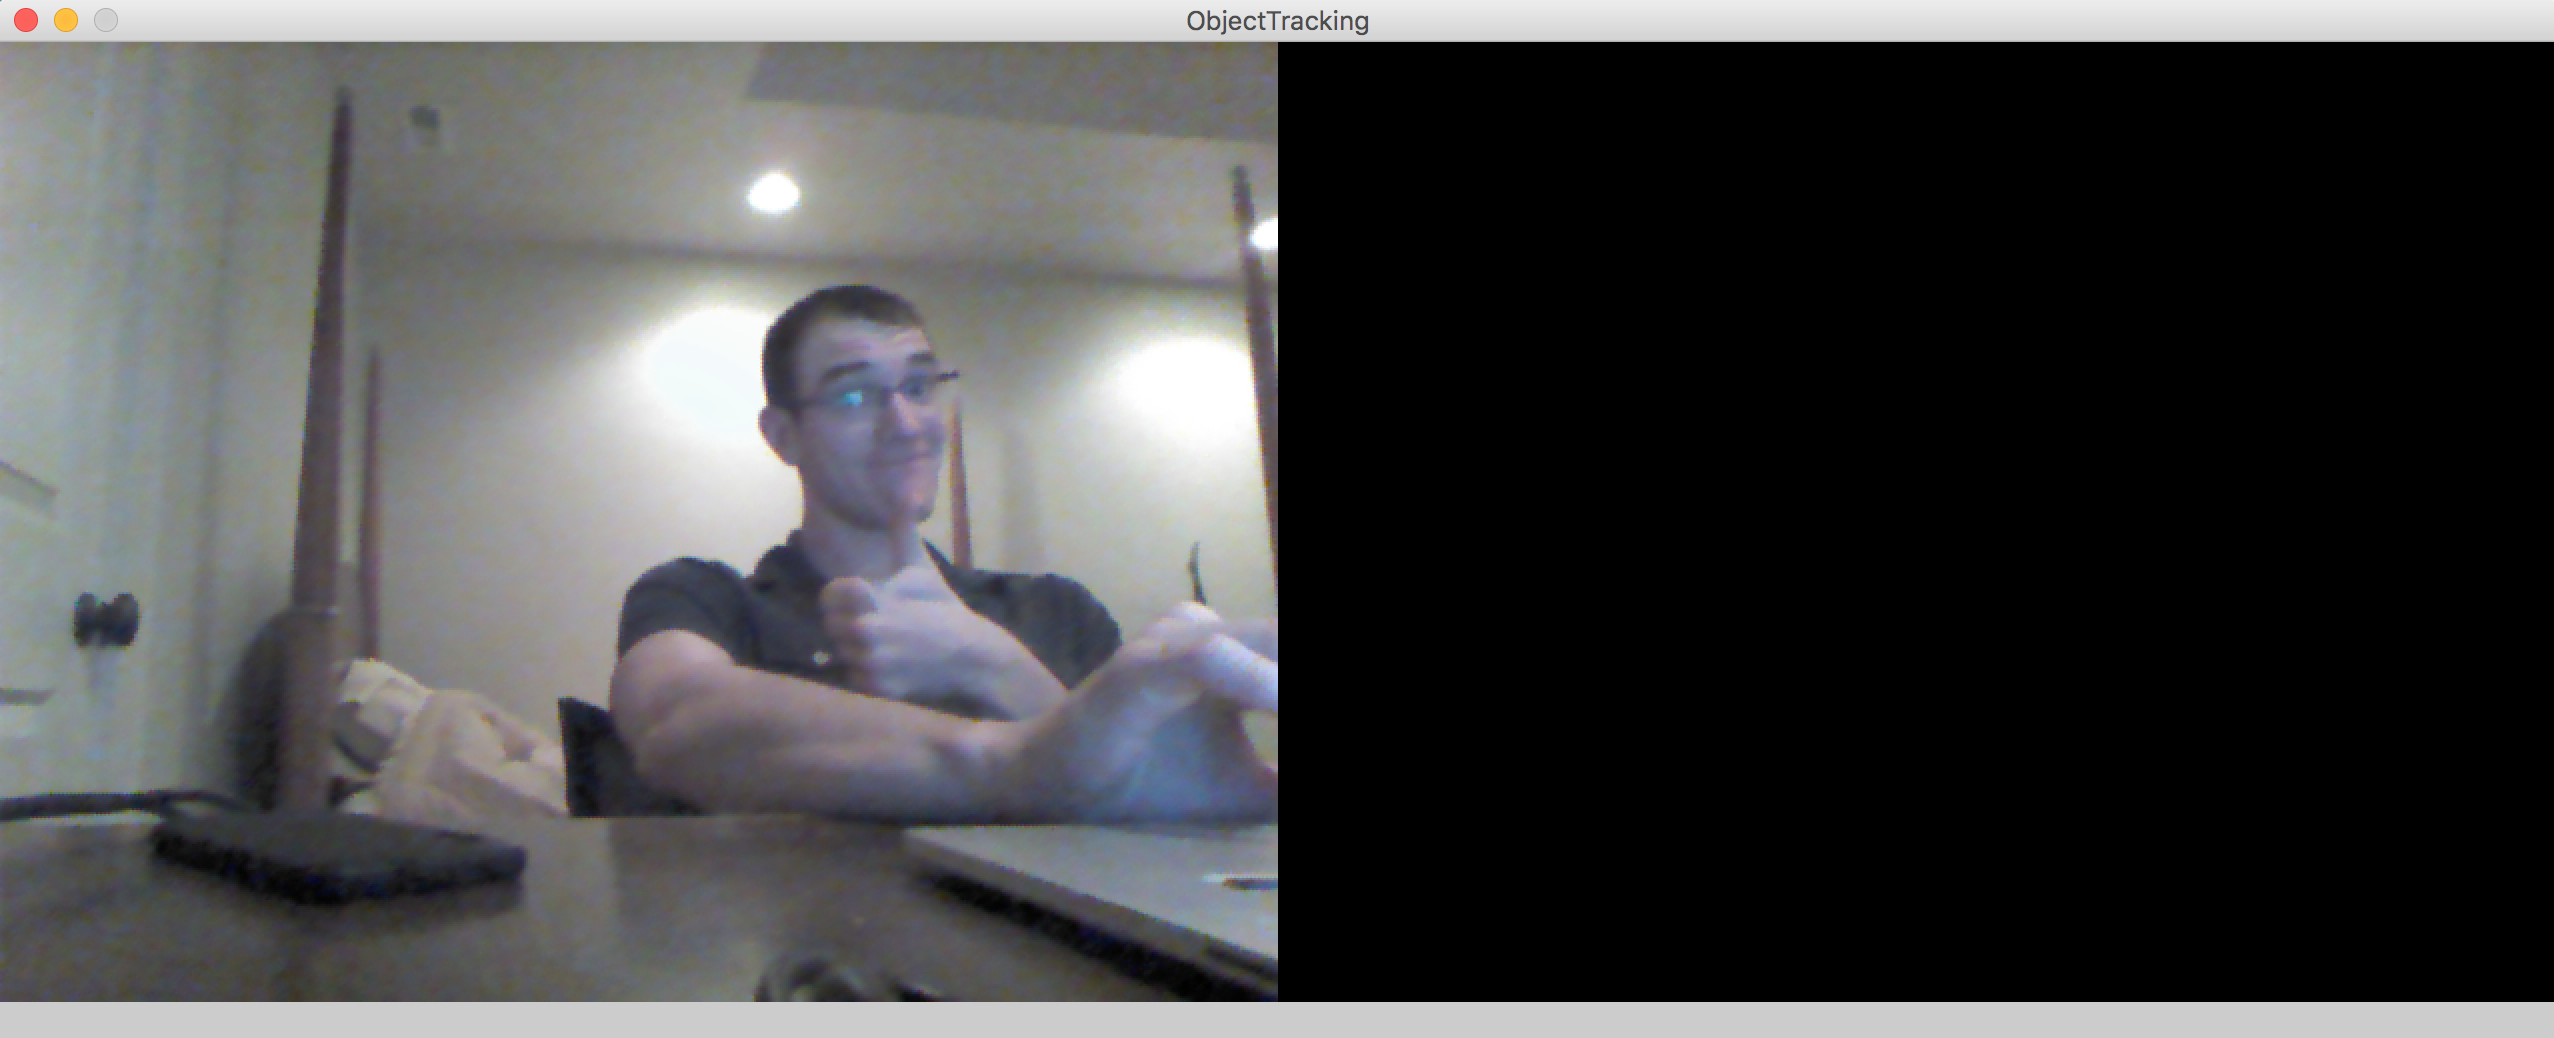
With the above code working you should see something like this:

Now that we have the basics, let’s get started with the fun stuff.
Thresholding
If we want to track an object by color the simplest way to do this is try and identify all the regions of an image where the color in question is strong. We do this with thresholding. Thresholding is one of the simplest methods of image segmentation where all pixels with an intensity \(I_{ij}\) above a certain threshold \(T\) are replaced with a white pixel and all other pixels are replaced with a black one. In this tutorial I will be tracking a bright red object. In order to threshold based on the red channel I first need to be able to calculate how “red” a pixel is. We can do this with the below function:
  float calcRedVal(color c) {
 return  c >> 16 & 0xFF - (c >> 16 & 0xFF + c >> 8 & 0xFF + c & 0xFF) / 3;
}
Each color is calculated using bit shifts for speed. The red channel is found and then the strength of the remaining channels is averaged and subtracted from the red. This removes how much red is naturally in the image and gives us a better view of the true red of an object. Now we can threshold the image by looking at each pixel individually.
// Grab all of the pixels from the Kinects video feed
img = kinect.getVideoImage();
  img.loadPixels();

  // Step through every pixel and see if the redness > threshold
  for (int i = 0; i < img.width*img.height; i += 1) {
    if (calcRedVal(img.pixels[i]) >= threshold) {
      // Set pixel to white
      img.pixels[i] = color(255, 255, 255);
    } else {
      // Set pixel to black
      img.pixels[i] = color(0, 0, 0);
    }
  }
  img.updatePixels();
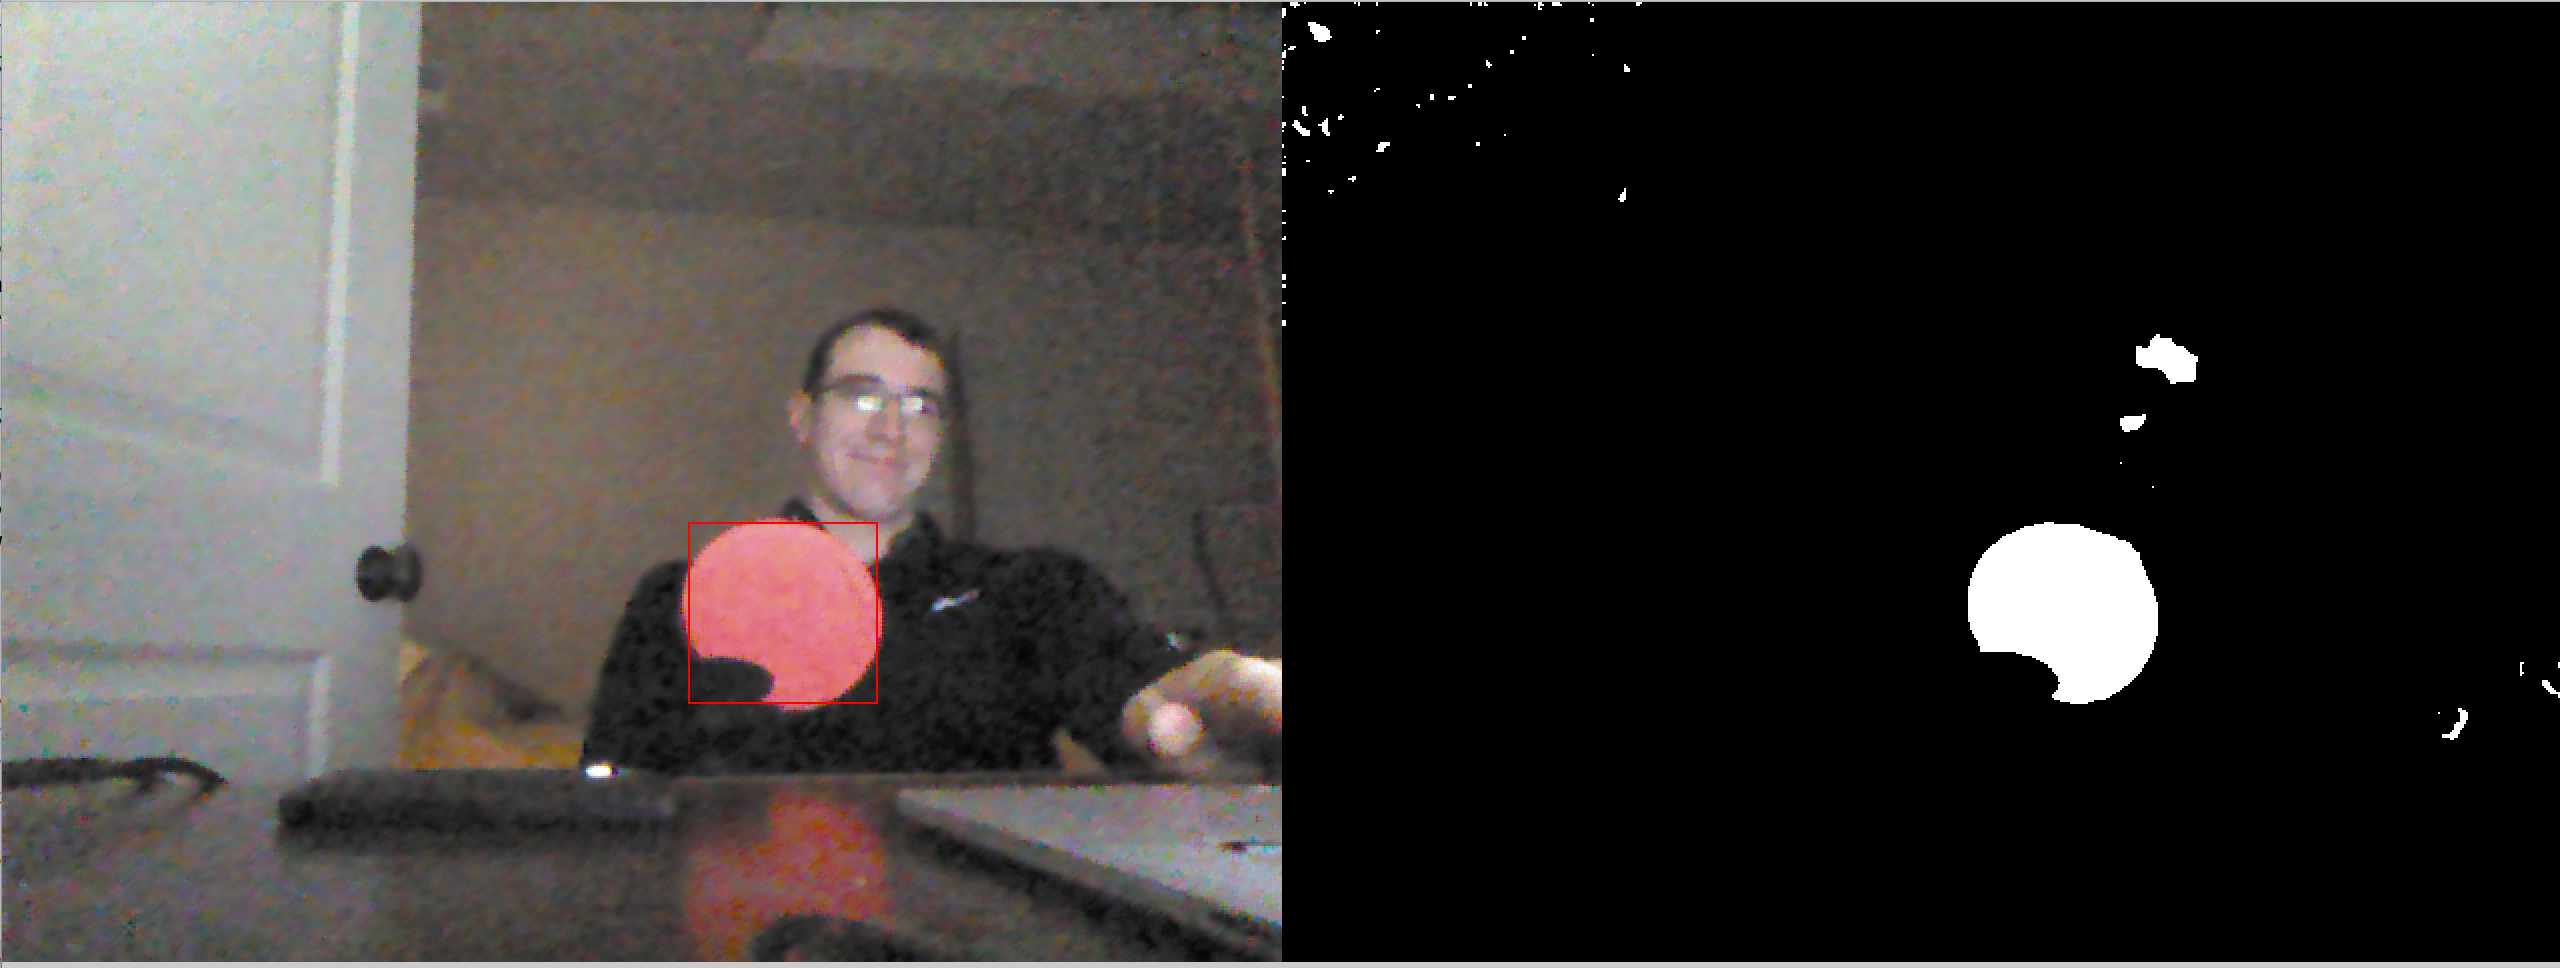
Now with the thresholded image we can now kind of extract the red object from the background!

Median filtering
This works well but as you can see there is a bit of noise in the image. In order to detect objects in the image it is helpful to eliminate noise. We can do this by using a simple median filter the median filter steps through each pixel in the image and assigns it the median value of the surrounding pixels. In processing this looks like.
  img.loadPixels();
  PImage temp;
  int[] tempPixels = img.get().pixels;

  // Step through every pixel in the image that is not on the border
  for(int y = size; y < img.height - size; y++) {
    for(int x = size; x < img.width - size; x++) {
      // Get a block of pixels around each pixel
      temp = img.get(x-size, y-size, 2*size+1, 2*size+1);
      // Find the median element
      tempPixels[y * img.width + x] = sort(temp.pixels)[(2*(2*size+1)-1) / 2];
    }
  }

  // Update the pixels in the image
  img.pixels = tempPixels;
  img.updatePixels();
As you can see this reduces the noise in the image and we are no longer picking up on my face as much!

Putting it all together
We are finally ready to detect our objects to do that I use the blobDetection library. The below code is taken from one of v3ga’s examples but let’s walk through what’s happening. First we need to create a blobDetector and get all of the blobs in the image.
  // Create a blob Detector
  BlobDetection blobDetector;

  //Create a temporary blob to analyze
  Blob b;

  // Step through all possible blobs in the image
  for (int n=0; n<blobDetector.getBlobNb(); n++) {
    // Get the nth blob in the list
    b=blobDetector.getBlob(n);

   // Ignore all blobs that are less than 10% of image size
    if (b!=null && b.w >= .1 && b.h >= .1) {
        strokeWeight(1);
        stroke(255, 0, 0);
        // Draw a rectangle around the object
        rect(b.xMin*img.width, b.yMin*img.height, b.w*img.width, b.h*img.height);
    }
   }
With this last piece we can now track the object!
All of the code for this project can be found here